Adding a Supplier company
- Sara mendez
- Laura Campo
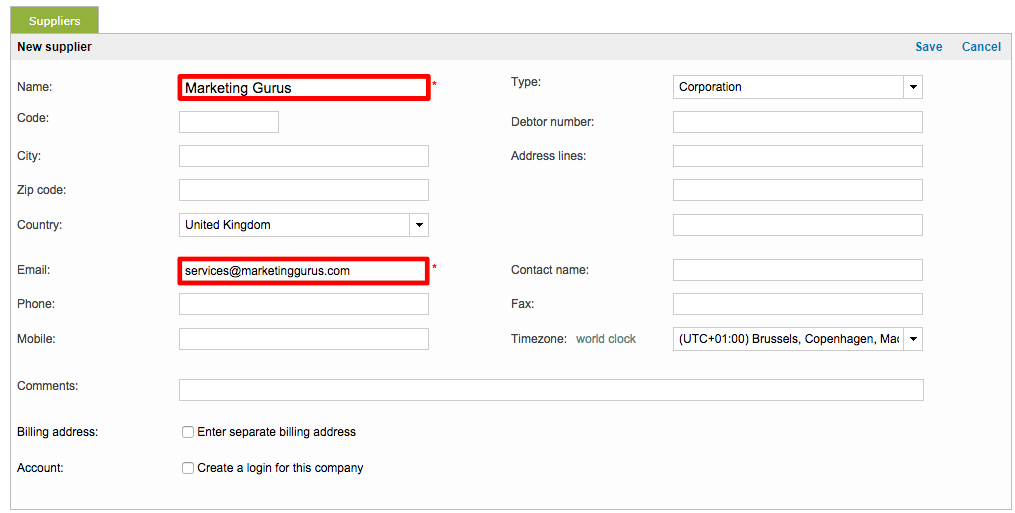
Any supplier may be added to the system to perform jobs in different projects. To add a supplier, first click on Suppliers in the toolbar and then click on New Supplier in the upper right corner of the dashboard.
The following sections have been provided to assist with adding clients to the system:
Enter Basic Information
After clicking on New Supplier, you will be presented with an entry form. Only the items with an asterisk are required; however, the more you enter into the system, the easier the vendor company will be to manage.
Name and Email
Required items include a Name and Email. Additional fields on the entry form are optional for adding vendors to the system.
- Name - Either the name of the company or the individual when a freelance provider.
- Email - Should be the primary contact's email information.
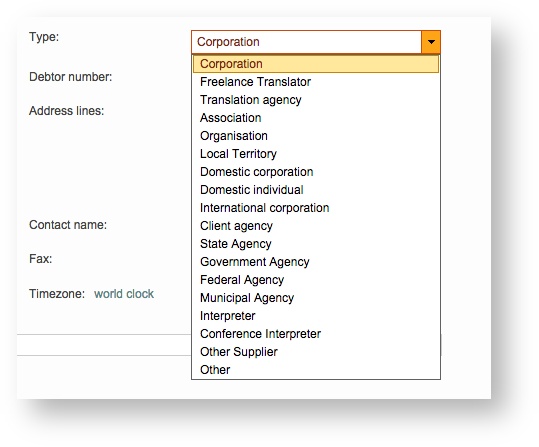
Supplier Type
Additionally, you can configure the type of company by using the Type drop-down menu. Company types are helpful when identifying the supplier in the system, specially as part of a supplier group. Additionally, each company type is highlighted with a specific icon.
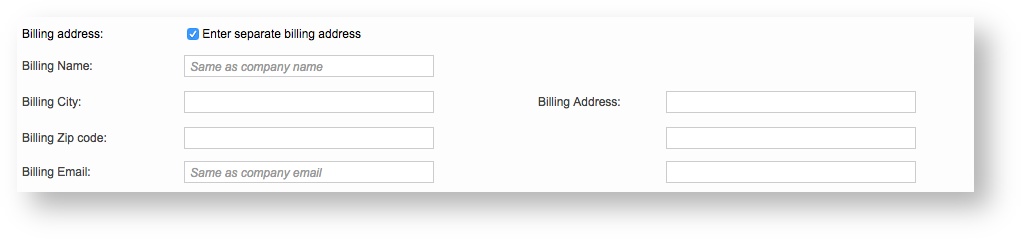
Separate Billing Address
Address information may be entered as part of the contact information. If the billing address is different from what has been entered in the top portion of the entry form, you can tick the checkbox next to Enter separate billing address and enter an alternative billing name, address, email, etc.
Creating a Login
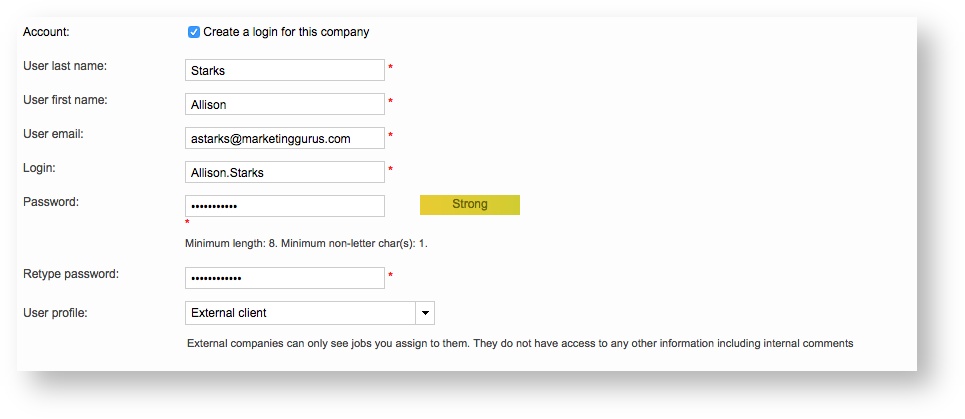
If you need your vendors to get your job proposals in their portal and perform jobs in the CAT environment, then a login will be needed to log into the system and access the Translation Editor. A login is not required if managers are exporting the jobs from the system and dispatching them outside the system. To create a login, tick the checkbox next to Create a login for this company and then fill in the required information. This includes:
- Last/First Name - Should be the client's main contact or the freelancers name.
- Email - The email of the entered user. For agencies or corporations, this will be the email of the primary contact for which the login is being created.
- Login - A User ID that will be used with the password for logging into the client portal.
- Password - The password for logging in. You will need to retype the password and a visual indicator is provided to show strength.
- User Profile - This define's the users access rights when logging into the system.
To choose a user profile and define access rights, click on the drop-down menu and then click on the desired selection. You have three options:
- External Worker - Suitable for those users who need to perform jobs and directly deliver back their work (translations, revisions or proofreading jobs). For example, Freelancers.
- External Worker (limited)- Suitable for users who are required to perform jobs for for which the back delivery should not be granted. Users with higher access rights will assign them specific tasks and will also be responsible to deliver the results to the client.
- External Manager - Suitable when there is a person in the vendor side who should take responsibility of the dispatching and back delivery of the results to the client. For example, Managers in LSPs.
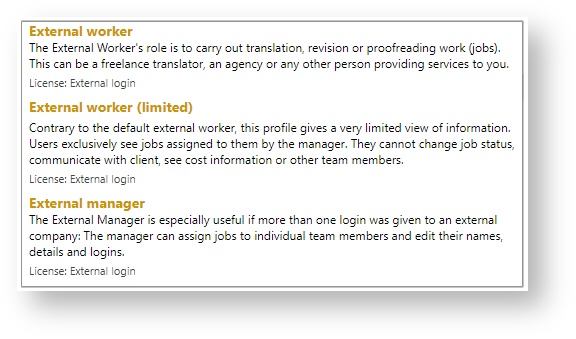
External companies can only see the jobs you assign to them. They do not have access to any other information including internal comments or notes
You can also create custom profiles with defined access rights. To learn more see the Access Rights section under Administration.
Save the Supplier
Once all information has been entered, click on Save in the upper right corner to finish adding the client to the system.

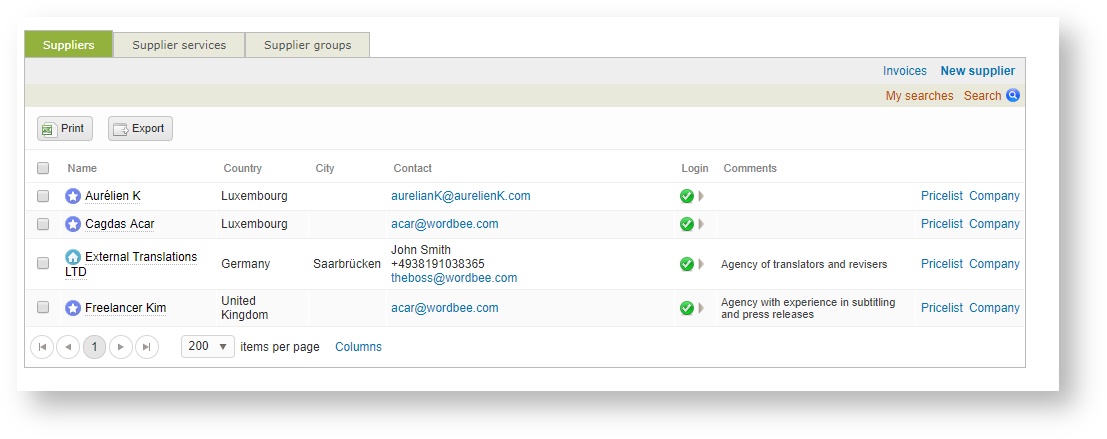
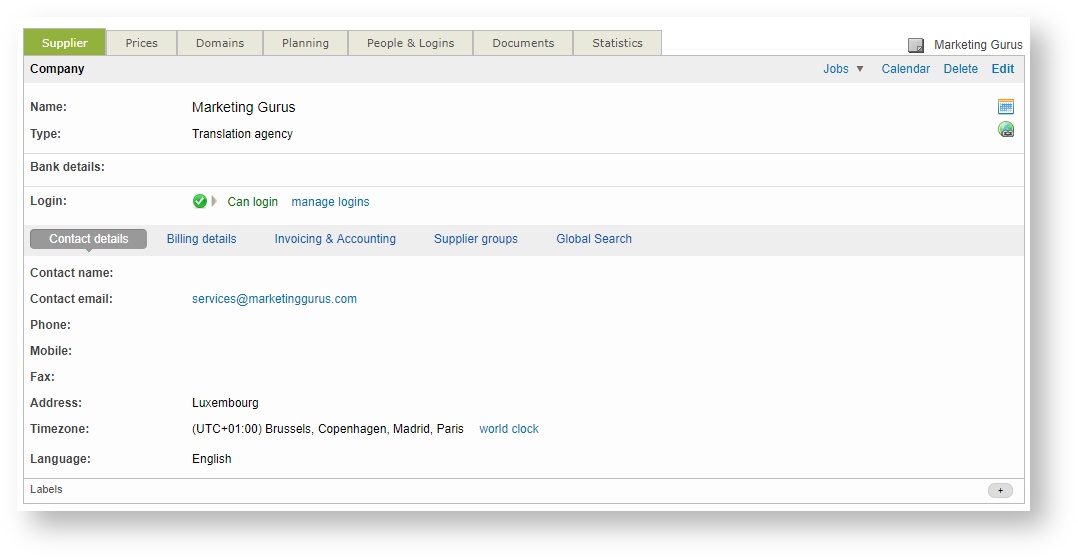
The client will appear as shown below and additional information can be viewed or configured after they have been added to the system.
Once a vendor has been added, you can configure or assign a price list and add pricing information for them. A default price is pulled from the standard price list; however, this information may be changed to meet your specific needs. To learn more see Supplier companies Pricing.
Additional Actions
After the client has been added, you will be able to view the client's information and make changes as needed. Four tabs reside at the top:
- Supplier Tab - View basic client information, contact details, billing information, etc.
- Prices Tab - View, add, or change pricing information.
- Domains tab - Fields of expertise from the company
- Planning - Check the agenda (working days, times and days off) of the company in this tab.
- People & Logins Tab - View current user information and add users, disable logins, remove users, etc.
- Documents Tab - Manage reference documents that belong to this supplier.
- Planning - Check the current workload of the supplier in the tab

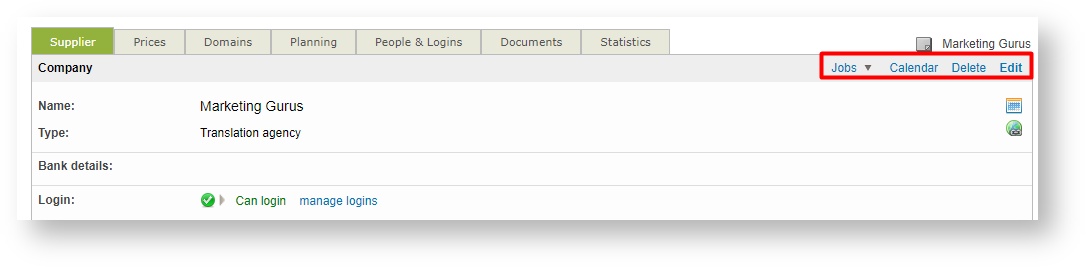
In the upper right corner, you will see the following options:
- Calendar - Access the calendar for the client.
- Projects - View a list of the client's current projects.
- Delete - Remove the client from the system.
- Edit - Make changes to the client.
Underneath the supplier name, you can also view the login status or click on Manage Logins to view current users for the client portal. A green circle with a checkmark shows the client has a login and a red circle with a dash shows they do not have a login.
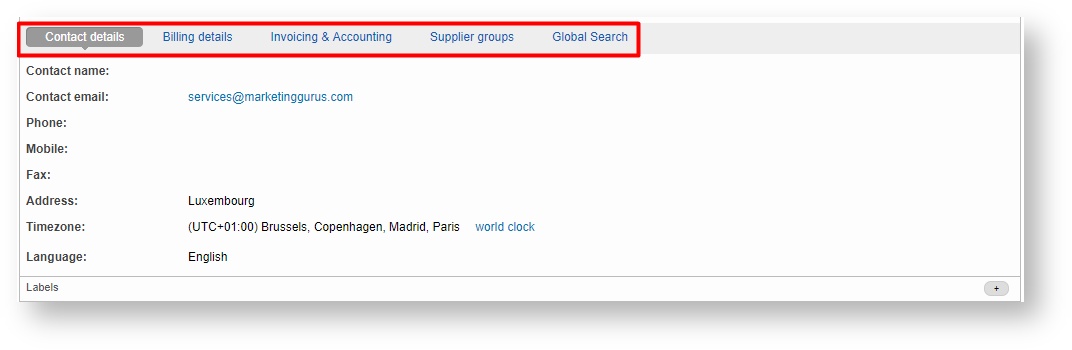
At the bottom of the screen, you can click on one of the following options to view more information about the client:
- Contact Details - View contact information including the name, email, phone, address and language. Click on the email address to send the vendor a message.
- Billing Details - View billing address and email information. Click on the email address to send a message to the current billing email.
- Invoicing & Accounting - View current invoice and accounting settings for the vendor. If nothing has been configured, then the Default settings will be used. It is recommended to enter pricing information before making changes to these settings.
- Translation Memories - Displays any translation memories accessible to this vendor (via Global Search).
This information may be changed by clicking on Edit in the upper right corner when viewing the supplier.
Related content
Copyright Wordbee - Buzzin' Outside the Box since 2008