Running a QA Check
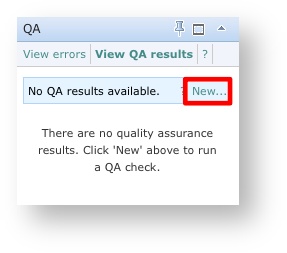
To run a QA check with a custom QA profile, all you need to do (providing you have the required access rights) is click on View QA results located on the right hand side of the editor in the QA pane.
If no results are available, you will see the message "No QA results available. " and will need to click on New... to choose a QA Profile.
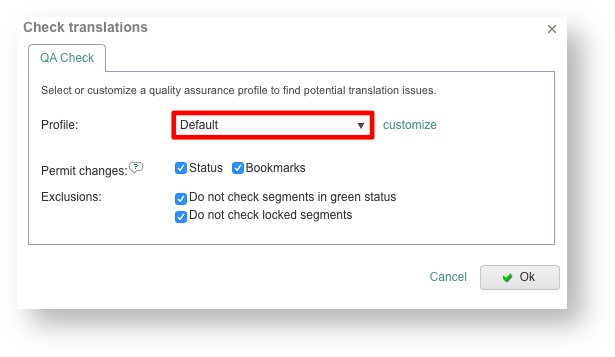
Then click on the Profile drop-down menu to select a QA Profile. Additional options are provided and automatically enabled. You may disable any of these before the check is ran including forbidding status or bookmarks changes and not checking segments with a green status or locked segments.
Please note that if only one QA profile is present, it will automatically be selected by default and you will not be able to make selections in the drop-down menu.
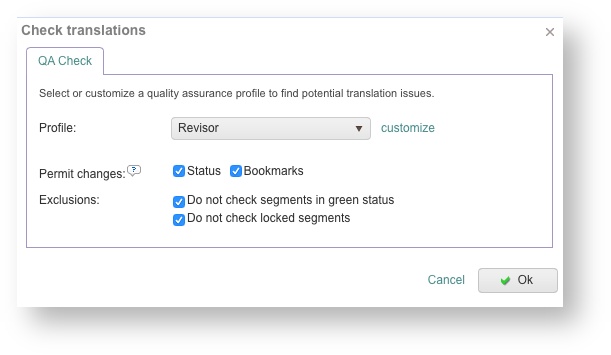
Once finished, click on OK to begin the QA check. In this example, the Revisor QA Profile has been chosen and the default options are used.
You will then be able to view, print, and share your QA results with all the other people working on the same project and make the necessary amendments. Errors in this example are flagged with a Red Status and will be listed within the QA Pane. An option is provided for seeing additional details about each detected error.
Related content
Copyright Wordbee - Buzzin' Outside the Box since 2008


