Customize Rules
- Stephan Böhmig
Beebox comes with a list of preset rules for various file formats (see Add New Rules). In some cases presets may be sufficient. However, you may need more control over which text is extracted for translation or which content is to be excluded. For all customization we recommend doing this interactively and online in Wordbee Translator:
A subset of formats will always require customization:
- XML and JSON: Specify nodes/attributes are to be translated. Specify if file is mono- or multi-lingual (contains multiple languages within same file).
- Microsoft Excel: Customization is required if only a subset of columns, rows or sheets are to be translated. Or if the Excel contains multiple languages in different columns.
- CSV: Specify which columns contain source and target texts.
This is the easiest approach for creating your own text extraction rules. Configuration is done online.
You require a Wordbee Translator account. You can obtain a 30 days trial or buy the smallest version, Freelance Edition. See www.wordbee.com for pricing information.
Let's create a sample XML rule!
Create new rule
- Login to Wordbee Translator anc click Settings in the top navigation menu.
- Then click the Configure link or directly a file format:
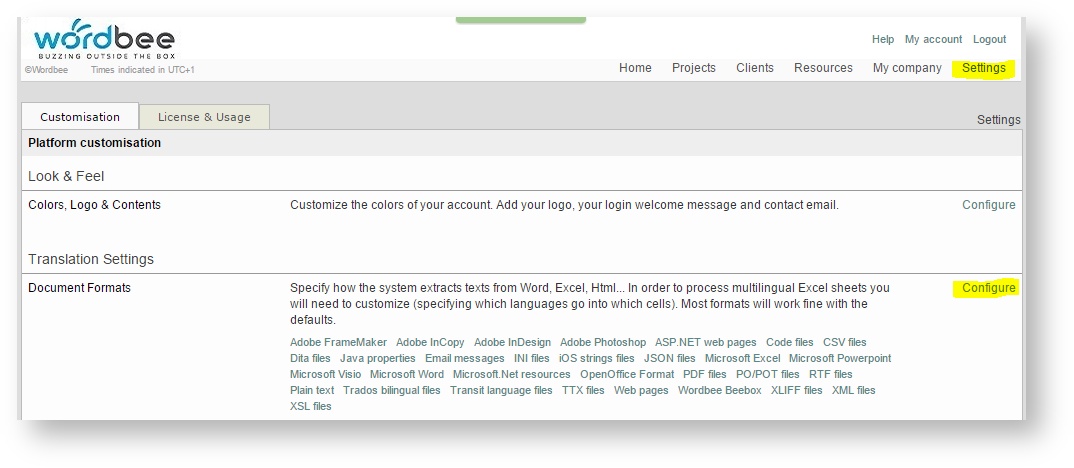
- For this tutorial we choose XML files. The page shows all current XML rules.
- Click Add new to add a new XML configuration:
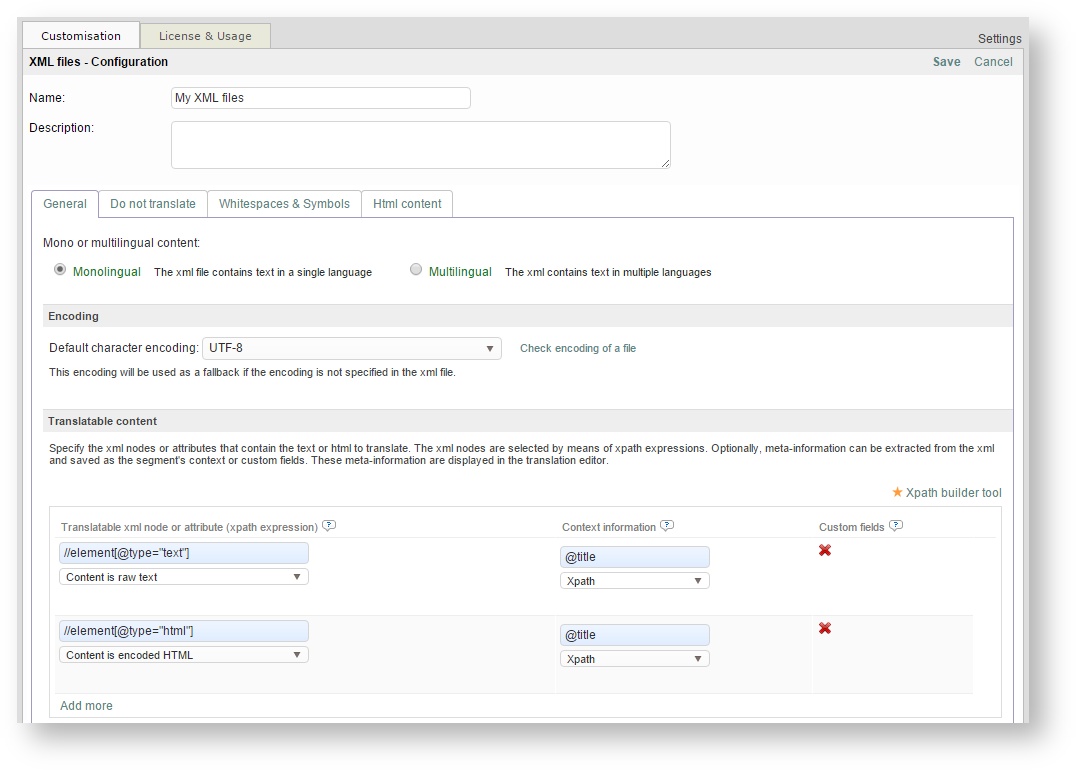
On this page you will find all XML configuration options.
The most important options are the file encoding and one or more XPATH expressions to specify which XML nodes or attributes are to be extracted for translation. In the example above we extract all "element" nodes having an attribute "type" of value "text". We tell the system that the node content is plain text. We further extract "element" nodes with "type" equals "html". For these nodes we tell the system that the content is HTML. HTML can be in CDATA sections or just be XML encoded.
Please also see the Wordbee Translator documentation.
Save and test the new rule
- Save your configuration: Click Save in the top right of the page.
- Test your configuration with the Test configuration link. This will open a dialog where you can upload your XML file and see what content is extracted.

Add new rule to Beebox
Once you are happy with your configuration, it is time to add it to your Beebox project.
- Click the Download link in the screenshot above to download the XML rule definition. Open the file in Notepad - we will copy & paste the XML later on.
- Now go to the Settings page of your Beebox project and click the Edit link.
- Scroll down to the Text extraction rules block and click Add or replace rules. A dialog opens:
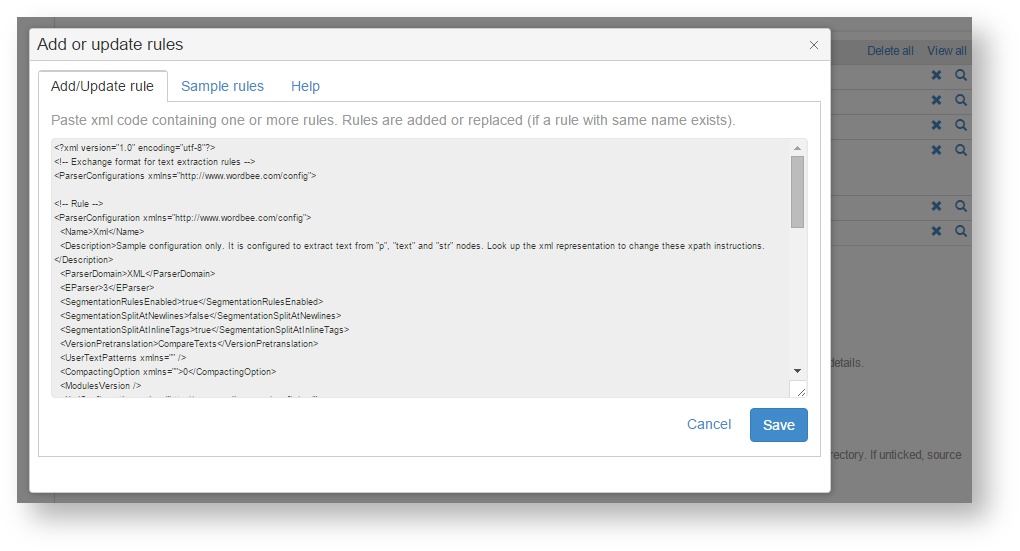
- Paste the XML downloaded previously into the text box.
- Last not least click the Save button to update the rules and close the dialog.
- Please do not forget to save your changed settings (link in top right of page).
Your new rule is now installed!
Related content
Copyright Wordbee - Buzzin' Outside the Box since 2008