Finalizing a Project
A project can be finalized after all jobs have been completed and all translated documents have been reviewed. When you finalize a project, each document can be finalized individually or all at once. Once the documents are finalized, they can be viewed by the client either via email or via the client portal.
You can also export a ZIP file with all translated documents to send to your client rather than sending individual files. The steps for doing so are different depending on the type of project: CoDyt or Standard.
Please see the following sections to learn more about finalising and exporting/downloading translated documents for completed projects:
How to finalize a Standard Project
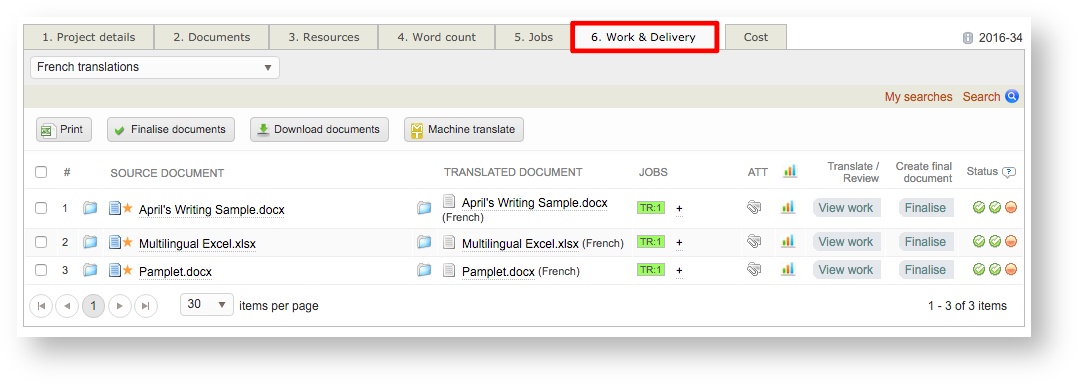
Access the project by clicking on Projects in the Menu Bar and then click on Select for the appropriate project. Next, click on the Work & Delivery Tab to see the current documents.
If more than one target language is included in the project, you will need to use the drop-down menu at the top right of the Work & Delivery Tab to choose the additional target languages and finalize those documents.
Finalizing Multiple Translations
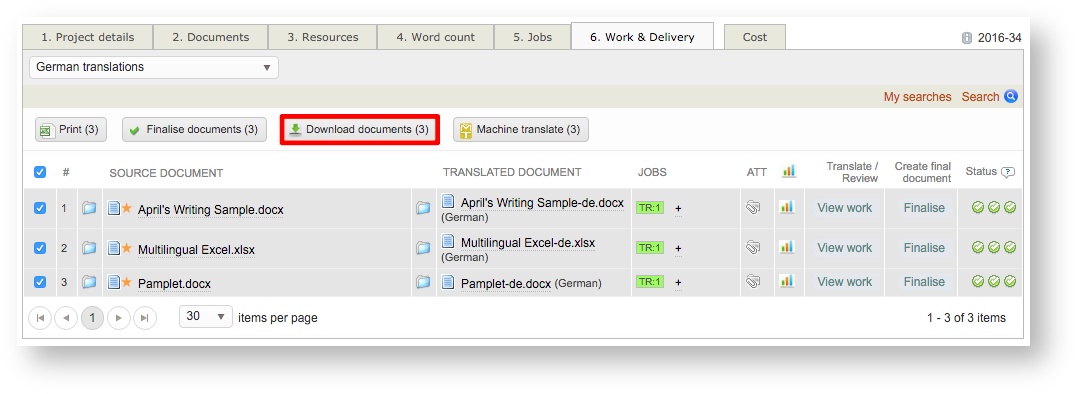
To finalize multiple or all documents for a target language, first mark each document you want to finalize by ticking the checkbox and then click on Finalize Documents.
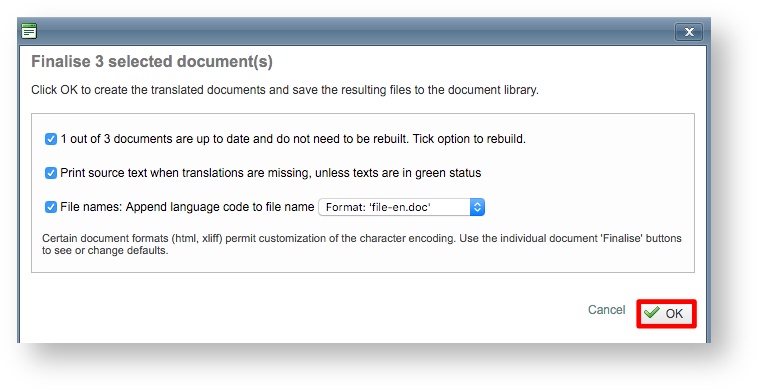
Next, the first two options are enabled by default in the pop-up window. If enabled, they inform the system to rebuild out of date documents and print source text any time a translation is missing. You can disable these options if needed by clicking on the checkbox.
Additionally, another option is provided for appending the language code to the file name. This is disabled by default, but can be enabled by clicking on the checkbox for the option. Click on OK when finished or Cancel to exit without finalizing the selected documents.
After clicking on OK, the Status Column will show three green check-marks for each chosen document. This means that the documents are complete and ready to be provided to the client for review and approval. You can download them as a ZIP file from the Work & Delivery Tab as well.
To learn how to download the files as a single ZIP file, please see the Download Translations section.
Finalizing Individual Translations
To finalize individual documents, click on Finalize in the Create Final Document Column for the appropriate document.
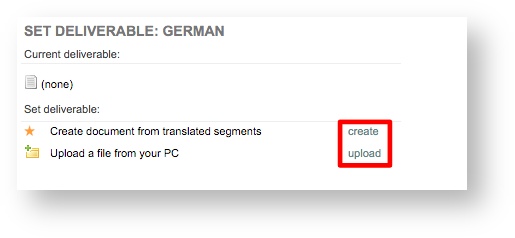
Then click on Create to create a document from the translated segments or Upload to upload the completed translation (when another tool has been used).
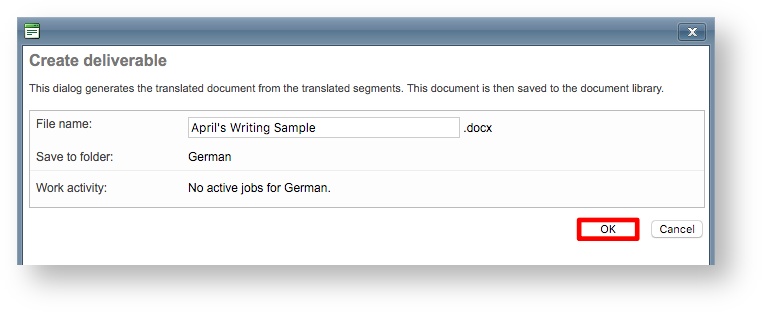
In the pop-up window, you can change the name of the file by clicking on the current one and entering the desired text. Then click on OK.
Once a document has been finalized for a standard project, you will see three green check marks under the Status Column to show that everything has been completed and it is ready for client review.
You can download multiple documents as one ZIP file after they have been finalized. To select specific ones, use the check boxes or select every checkbox to download them all. See the next section to learn more!
Downloading Translations
You can download one or more documents after they have been finalized to provide the final documents to the client via email or another method. The files are downloaded as a ZIP file, which can be unzipped on your computer by performing a double-click.
Use the check boxes to select each file you want to download. Then click on Download Documents.
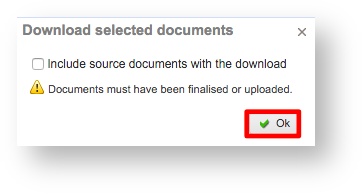
Next, an option is provided to include the source documents as part of the download. By default, this option is disabled, but can enabled be by ticking the checkbox next to option. Click on Ok to finish.
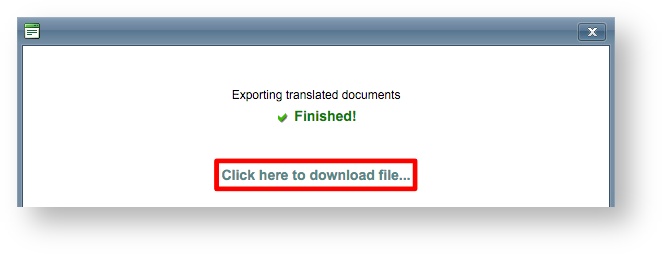
After the file has been created and is ready to download, you will see the following pop-up window. Use the Click to download file option to download the ZIP file containing the chosen documents. Click on Close Window to exit this pop-up window.
The download file will be named with the current date, as shown below. It will need to be unzipped before the files can be opened and viewed.
Once it has been unzipped, you will be able to expand the folder and view each individual document.
How to finalize a CoDyt Project
For CoDyt projects, first access the project by clicking on Projects in the Menu Bar and then clicking on Select for the appropriate project. Next, click on the Status Tab.
Finalizing Translations
In the Finalize Translations section you will see an option to finalize translations based on the target language. You can also finalize all translations at once for a project. Click on Finalize Now for the translations you want to finalize.
You can also click on View to see the translations before finalizing them.
You will be redirected to this screen and can click on the Status Tab again to return and finalize the translations.
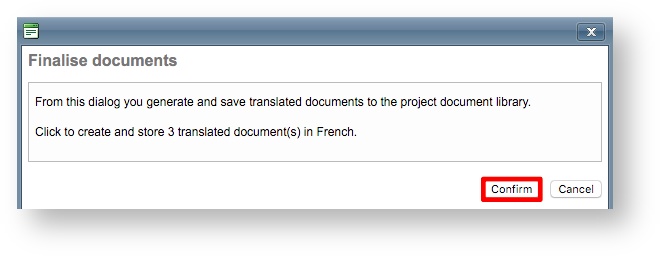
After clicking on Finalize Now, a new pop-up window will appear. You will need to click on Confirm to create and store the translated documents. If you do not want to finalize them right now, click on Cancel to exit the pop-up window.
Once documents have been finalized for a CoDyt project, you can export all completed translations in a ZIP file. This is beneficial when you do not have the client portal feature and want to quickly send the finalized documents to the client for review.
Exporting Translations
The Export Translations section on the Status Tab can be used to export any documents that were finalized after a certain date.
First click on the Calendar Icon to select a date and the Clock Icon to select a time. Then click on Find to locate finalized translations from the selected date to the current date.
Once the translations have been found, they will be listed for each target language with a count for the number of documents. To export them into a ZIP file containing all documents, click on Export.
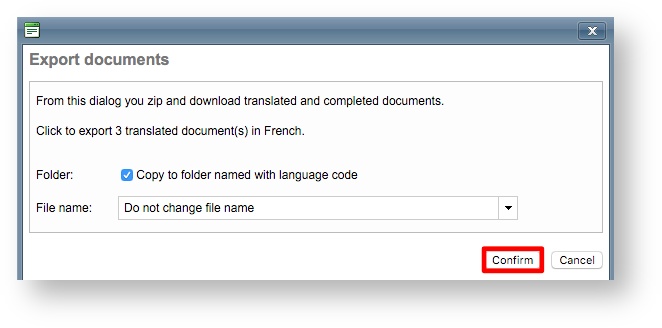
The option for copying the folder name with the language code is enabled by default along with the option to not change the file name. You can choose a different option under file name or disable the folder option. When finished, click on Confirm.
Once the export has finished, you will be able to download the ZIP file containing all your documents. To do so, click on the Click here to download file... option.
After unzipping the file, you can expand the parent folder and will be able to view each translated document as shown below:
Copyright Wordbee - Buzzin' Outside the Box since 2008
