This page describes the wizard for creating new general purpose projects. If you need a project to translate CMSes, you should go here Compare project types.
To create a project:
- Login to the Beebox, the list of all your Beebox projects shows up
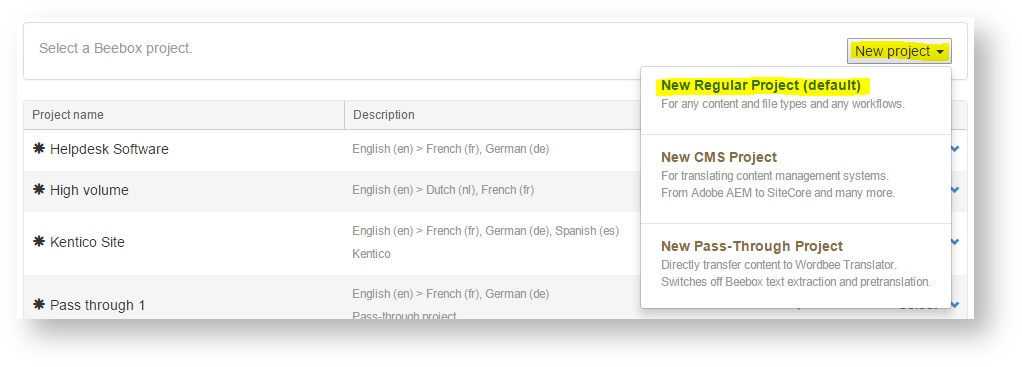
- Click New project in the top right and then Create new New regular project
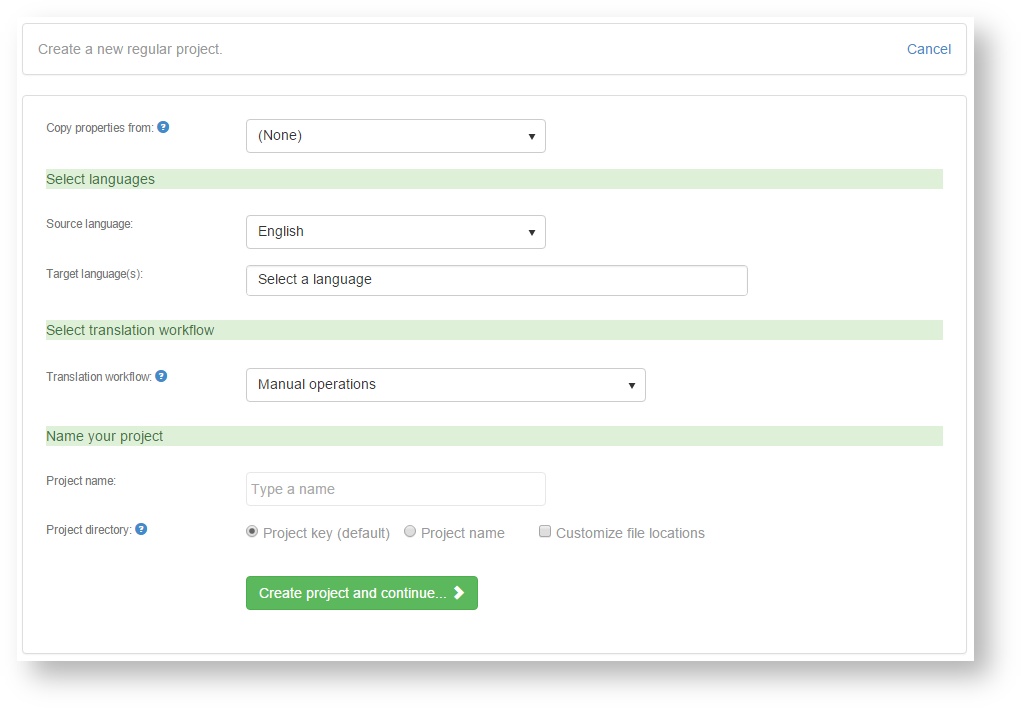
- A wizard opens. Fill in all fields:
The different fields are:
Wizard field | Description |
|---|---|
| Copy properties from | Choose to either clone an existing project or to create a new project from scratch. When you select a project from the pick list, most other form options disappear. |
Languages | Choose one source language and one or more target languages. |
| Translation workflow | Decide how content is translated:
If you are a Beebox expert you can fine tune or change workflows anytime later with the automation settings. For example to combine machine and human translation. |
| Process content | Option available with certain workflows only. The Beebox processes content sent by the CMS in regular intervals. Specify this interval. For a test workflow you may want to chose a small interval like |
5 minutes to reduce wait times. During production we recommend to choose 30 minutes or more. | |
| Automatic approval | Option available with certain workflows only. The rule of thumb is: Untick the option to get higher quality translations. When a CMS sends new content, the Beebox will attempt to pretranslate sentences from earlier completed translations. For example, "click here" may have been translated in the past already. Now, it may be that the perfect translation changes depending on the text coming just before and after the sentence (we call this the "context"). The option basically tells whether we want or do not want to send a pretranslated sentence again to a human translator if the context is different than in the past. |
| Project name | Give your project a name. The name can be changed anytime later. |
| Project directory | All project related files are stored in a directory inside c:\beebox (or similar). The directory name |
on disk is either |
the unique project key (assigned by system) or the project name. |
...
The former might look like "c:\beebox\c8ae1d0a-c650-4e39-88de-fa580c87de03" and the latter like "c:\beebox\myproject". Customizing source and target file locations By default, the directories containing your source and target files are \in and \out inside the project directory. Change this only if source or target files must be stored in specific locations such FTP or Cloud Sharing directories on the server. Tick the Customize file locations option and type directory paths into one or both fields: |
- Click Create project and continue.
- Your project is created. The dashboard page opens.
...
Depending on your workflow, the dashboard may ask you to do some more configuration.
...
You will likely want to customize the list of file types:
...


