Skip to end of metadata
Go to start of metadata
How to add a new resource
Step 1: Add a new resource
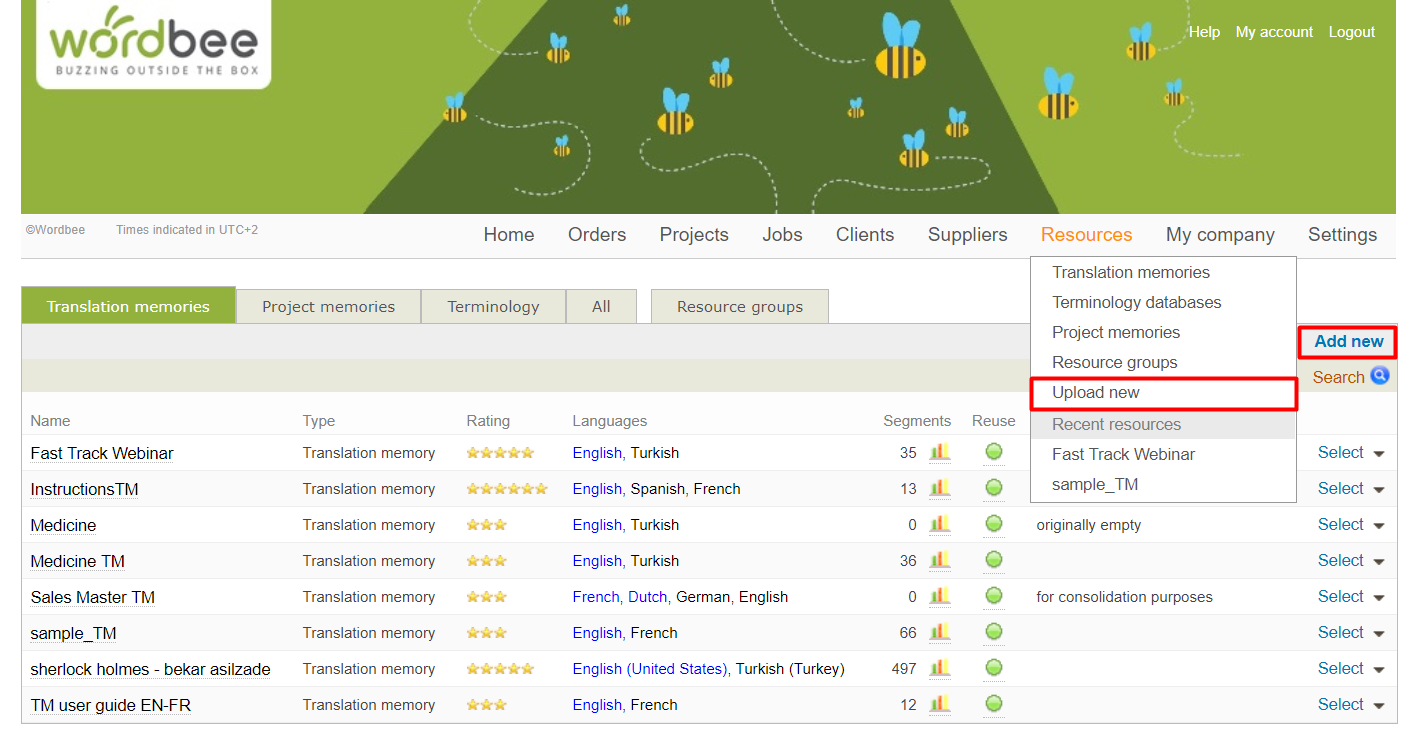
Click on Resources in the Menu Bar and then the appropriate tab Translation Memories (TM) or Terminology. Then click on Add New. The processes for uploaded these two linguistic resources are essentially identical. For this example, we will be showing how to upload an existing TM.
Step 2. Create a new database or import database from file
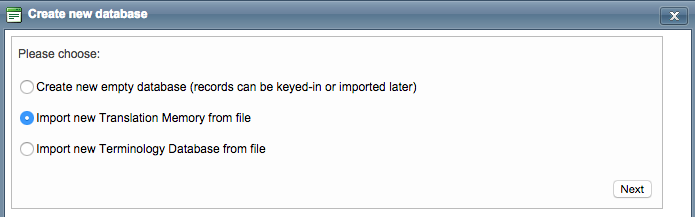
Next, choose to import a new Translation Memory or Terminology Database and then click on Next.
Step 3. Choose the file format
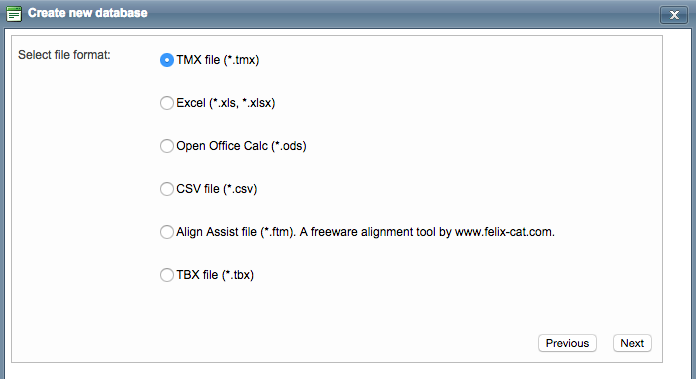
Select the file format you want to upload and click on Next.
TMX/TBX Import - Click here to expand...
TMX/TBX Import |
|---|
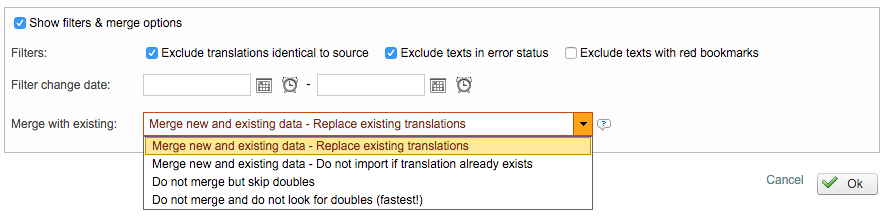
Select a File to Upload Click on Select to browse for and select a file. Then click on Next to continue.  Step 4: Additional Configuration OptionsAfter choosing a file to upload, you will have the option to make additional configuration changes. This includes electing to not skip mono-lingual records, selecting or removing languages for the import, and several filters and merge options which become useful in case you need to get rid of duplicates: Merge new and existing data - Replace existing translations (Default) - This will merge the segments being imported, in case they appear twice. The source language to compare the segments will be defined in the language menu of the previous step. It is the recommended selection if you want to keep the last translation version available in the file (entries will be imported by natural order). Merge new and existing data - Do not import if translation already exists - This will merge the two source segments and the matching translations, keeping the first version of the translation uploaded in the system. Do not merge but skip doubles - Data will not be merged, but instead added to the TM and all doubles will be skipped. This means you will be able to keep alternative translations for a given source segment in different entries. Do not merge and do not look for doubles - All data will be added in the system as is, no further checks.
 Once all changes have been made, click on Finish to upload the resource. 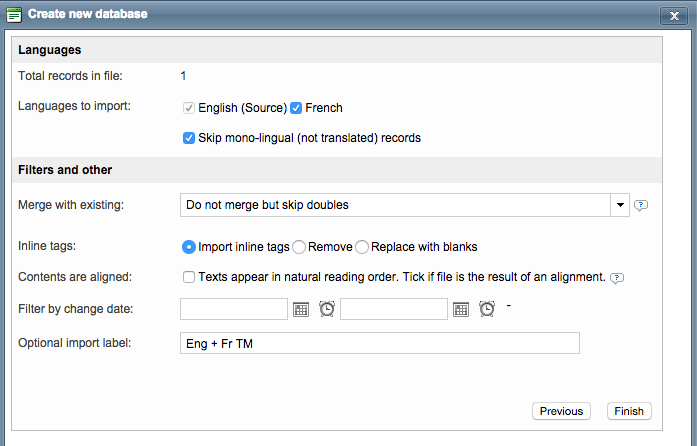 |
Other import - Click here to expand...
Other Import |
|---|
Select a File to Upload Click on Select to browse for and select a file. Then click on Next to continue. 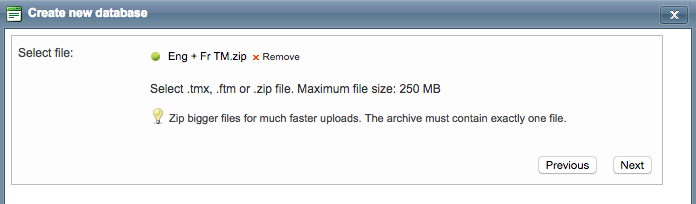 Step 3. Define which contents need to be importedSince you are using a tab or column delimited file, you will need to define where the contents for each field are located. Note you can select all sheets in the file and also skip the header line if required. Columns may contain: Mandatory fields: Optional fields Comments for each language in a separate column. Importing these will allow you to keep context information in a comment record (accessible via the Timeline) Label/Domain information if you have such properties defined in your system. The use of labels and domains is optional and specific to each platform. All segments imported in the same operation will carry the same information at the label/domain level. Custom fields are the metadata or additional properties that you want to import into the system to keep well-documented resources (Definitions, examples, URLs, etc.) You can learn how to configure Custom Fields in the dedicated section of the documentation.
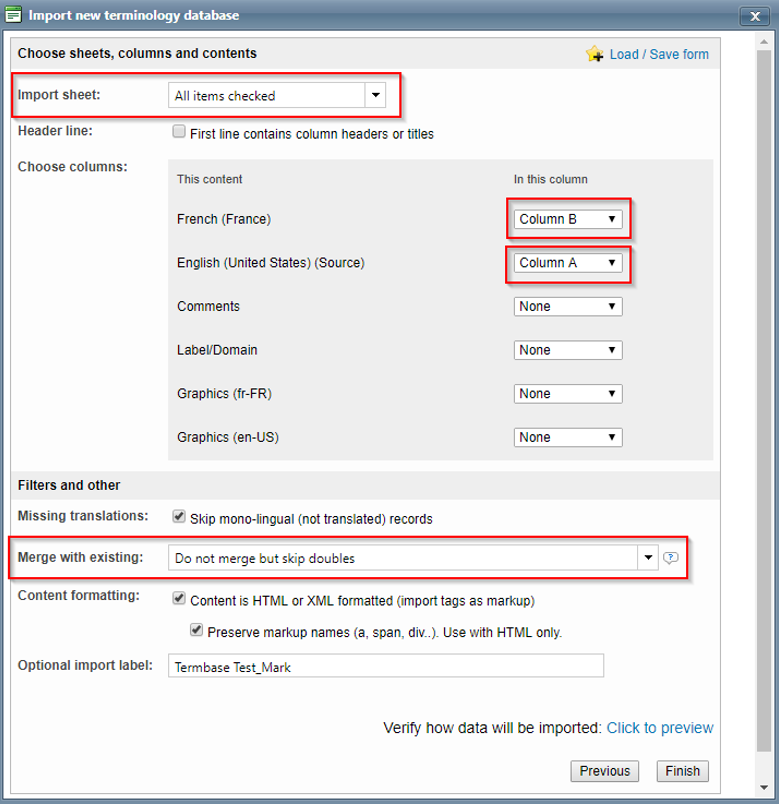
Step 4: Additional Configuration OptionsAfter choosing a file to upload, you will have the option to make additional configuration changes. This includes electing to not skip mono-lingual records, selecting or removing languages for the import, and several filters and merge options which become useful in case you need to get rid of duplicates: Merge new and existing data - Replace existing translations (Default) - This will merge the segments being imported, in case they appear twice. The source language to compare the segments will be defined in the language menu of the previous step. It is the recommended selection if you want to keep the last translation version available in the file (entries will be imported by natural order). Merge new and existing data - Do not import if translation already exists - This will merge the two source segments and the matching translations, keeping the first version of the translation uploaded in the system. Do not merge but skip doubles - Data will not be merged, but instead added to the TM and all doubles will be skipped. This means you will be able to keep alternative translations for a given source segment in different entries. Do not merge and do not look for doubles - All data will be added in the system as is, no further checks.
 Once all changes have been made, click on Finish to upload the resource. |
Learn more
Check all the details and configuration possibilities of the resource profile in the next section: Resource profile page