The status bar
On the upper part of the window, you find the status bar containing the information about the document you are working on, the language pair for your translation and the status of the translation (Not started, In progress, etc.):
This bar can be used to perform the following actions:
- : Statistics: When you click on this button, it opens the Document's work progress window with the following elements:
- Total segments: Number of segments that this document contains.
- Translation: Dark blue = Human translation, light blue = Exact pre-translation, light grey = Fuzzy pre-translation.
- Validation: Percentage of validation done.
- To translate: Segments to be translated.
- To correct: Segments to be corrected.
- Last change: Date on which last change was made
- Last error check: Date on which last check was made
- Last comment: Date on which last comment was added.
- Click on the document's arrow to display the Job documents window. In this window, you can see all documents that make up the job assigned to the supplier.
- Click on Go to library to open the project's Documents page.
- Click on the language pair's arrow to select the pair in question from among all those that the document accepts.
- Xliff/Word: see Continuing the work offline with Xliff
- Click on the Status' arrow to set the status of the translation (Not started, In progress, Completed…)
- Click on the Preferences button to open a window in which you can set up the following parameters:
- General - Define how Wordbee Translator controls automatic translations and auto-save. Moreover, in this section, you can set up manual or automatic propagation if needed.
- Shortcuts - Define some of the shortcuts available in the online Wordbee Translator interface.
- Colors & Styles - Adapt the text color, font, and styles as used in the source language panel, target language panel and translation memories.
- Editor Layout - Select how the different panels are displayed (horizontally or vertically); and the number of segments you want to display per page (between 10 and 200).
- Click on the maximize button to minimize/maximize the source/target language panel.
Continuing the work offline with Xliff
Wordbee enables you to take translation or revision work "offline". It means that you can use other CAT tools (for example, CAT tools which do not need an Internet connection) to continue your work and still manage all the workflows inside Wordbee.
The procedure is as simple as it can possibly be:
Exporting to Xliff
The screen below shows the Wordbee translation editor. A Standard/CoDyt project has been created in Wordbee and so, a document to translate/revise has been imported.
You now want to translate it "outside" Wordbee, meaning that you want to do it "Offline", using another CAT tool for example. To do so, click on "Xliff" on the status bar and then on "Export document to Xliff":
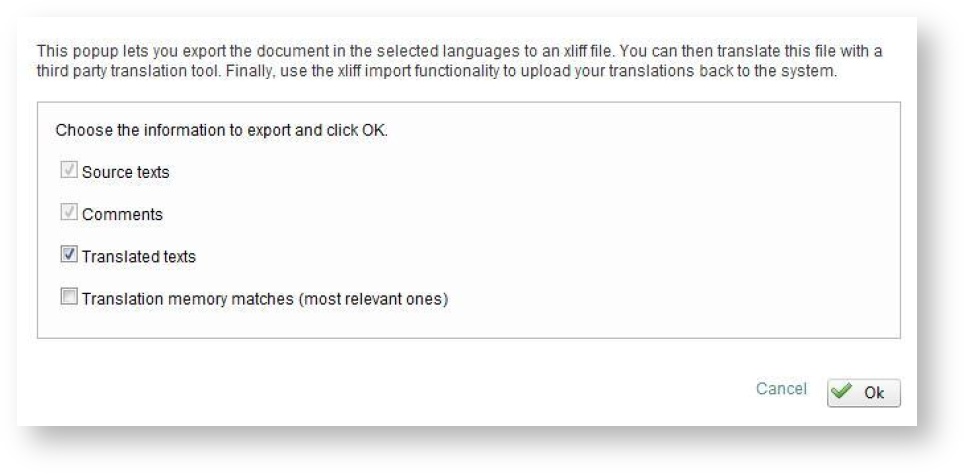
- You will see this window:
- Click on Ok to confirm the download x of the Xliff file.
Importing an Xliff file
Once the file has been translated you need to upload it back to Wordbee. To do so, go to the translation editor containing your document, click on Xliff on the status bar and then, on "Import document from Xliff".
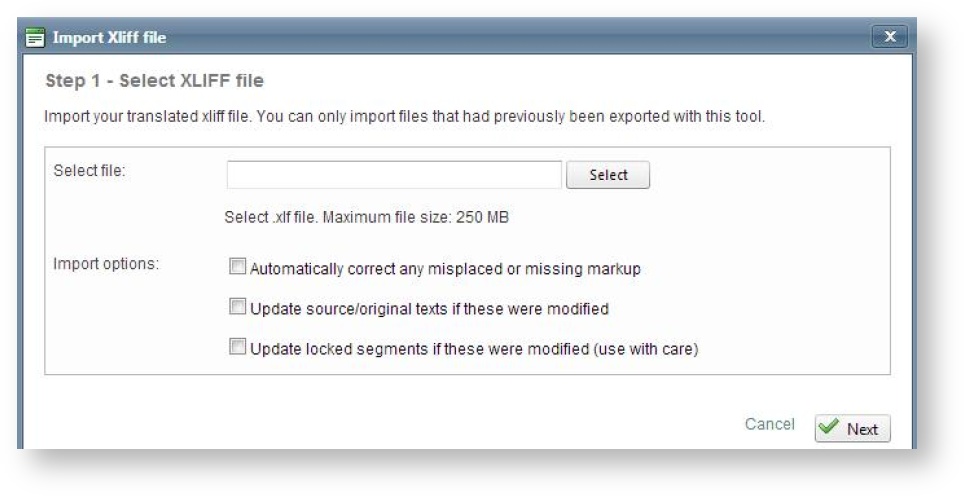
- You will see the following dialog box:
- Select the file from your computer (it needs to be a .xlif file).
The three options need some explanation: The first one should be ticked if you would like Wordbee to verify and (if needed) correct markups. The second option should be ticked if you edited the source text and want these changes to be imported as well. Use this option with care! The third option should be ticked if you edited locked segments and want these changes to be imported as well. Use this option with care!
- Click on Next and the system will first check your file (without importing it yet) and show you the number of additions or changes (it compares your translations, one by one, with those contained in Wordbee). If all that looks fine, simply confirm and have the changes be applied.
Note: This option is, by default, available to internal users and not to external ones but you can modify this by going to Settings - Customization - Accounts and security - Access rights. Choose an internal/external user and tick on/off the xliff option.
Exporting to Word
This feature allows you to work offline. For example, if you go to a place where you cannot access Internet, export your document to a MS Word format and work on it offline keeping the memories matches.
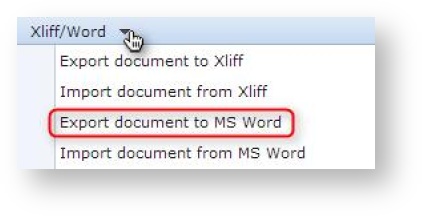
- Click on "Xliff/Word" in the status bar and then on "Export document to MS Word".
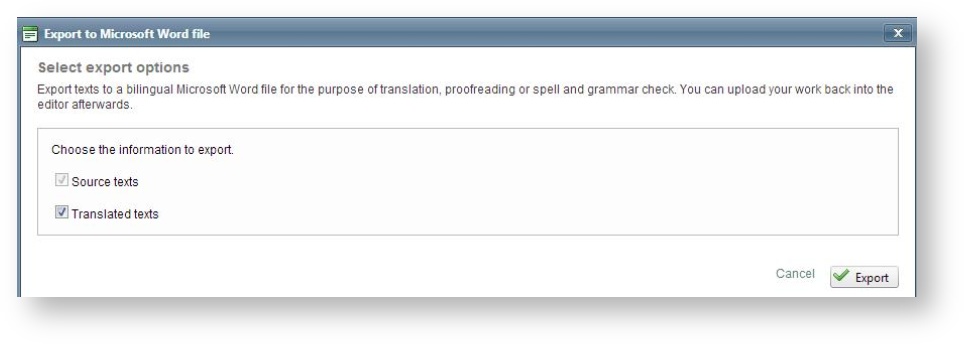
You will see this window open:
Select if you only want to export source texts or both source and translated texts and click on Export.
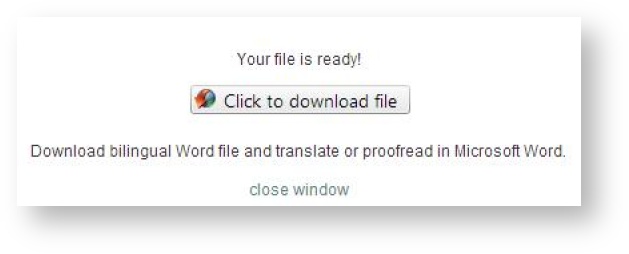
You will reach this pop up window:
- You can Click to download file and work on your text in a MS Word format.
Import a MS Word file
When your work is finished, you simply have to import back your document in Wordbee. To do so:
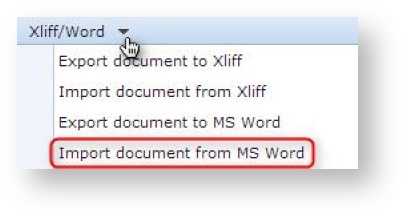
- Click on Xliff/Word on the status bar in the translation editor. Then, select Import document from MS Word.
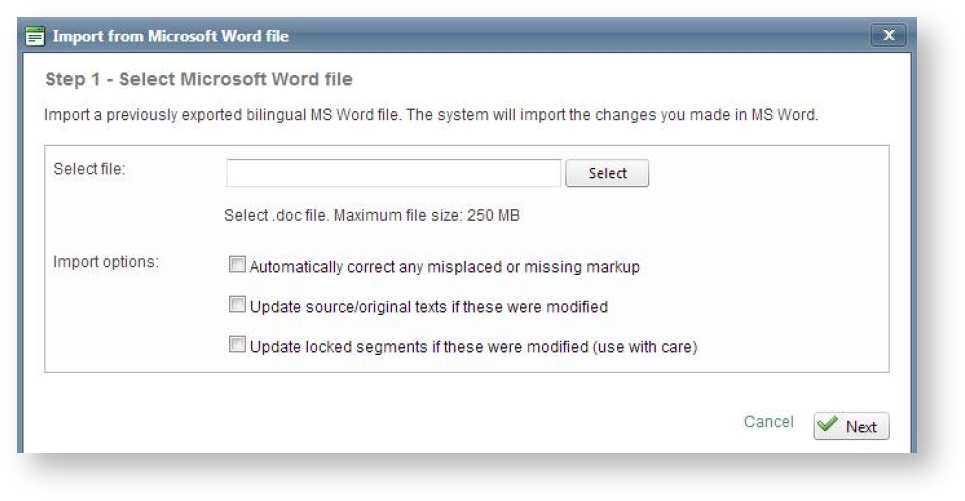
This window will open:
- Select the file from your computer
- Select your import options as for an Xliff file.
- Click on Next. The system will import your file with all the changes you made offline.
Note: This option is, by default, available to internal users and not to external ones but you can modify this by going to Settings - Customization - Accounts and security - Access rights. Choose an internal/external user and tick on/off the xliff option.
Copyright Wordbee - Buzzin' Outside the Box since 2008


