Once you have successfully Added a New Order Form and made the necessary configuration changes, it is time to assign that order form to a client(s) in the system. A new order form may be created and configured to be a customized form for a specific client.
Additionally, you may create one form and assign it as part of your company settings to be used for all clients submitting orders to the system.
...
If the client is active and has a login for the system, they will be able to view this form and complete it to submit orders. If an order form is not configured and assigned in the system to the client, then they must use the Classic Order Form to submit a request. By default, the classic order form is enabled in the system for each client.
In addition, the client has the option to revert back to the classic order form if desired when filling in the order form to submit a request for services.
To recap, in order to use a custom order form for your company or a specific client, the following must be completed:
- Create and Configure a New Order Form.
- Assign the New Order Form to a Client (shown below).
- View the Order Form in the System (shown below).
If an order form has not been assigned to the client that has been logged into the system, then the order form will appear as shown below:
The following will show you how to assign the order form to a client and view the order form:
| Table of Contents |
|---|
Assign to a Client
To get started, click on Clients in the toolbar at the top of the screen:
...
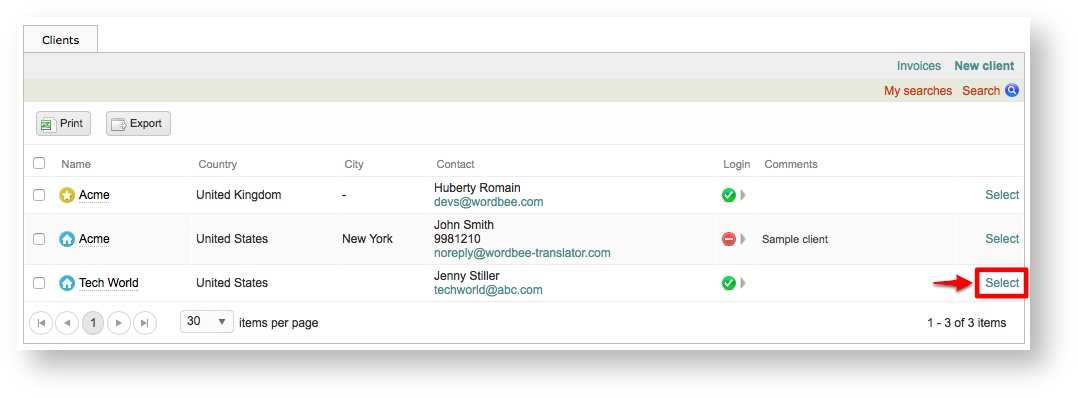
Then click on Select to the right of the client you want to use for assigning the order form, as shown below:
At the bottom of the
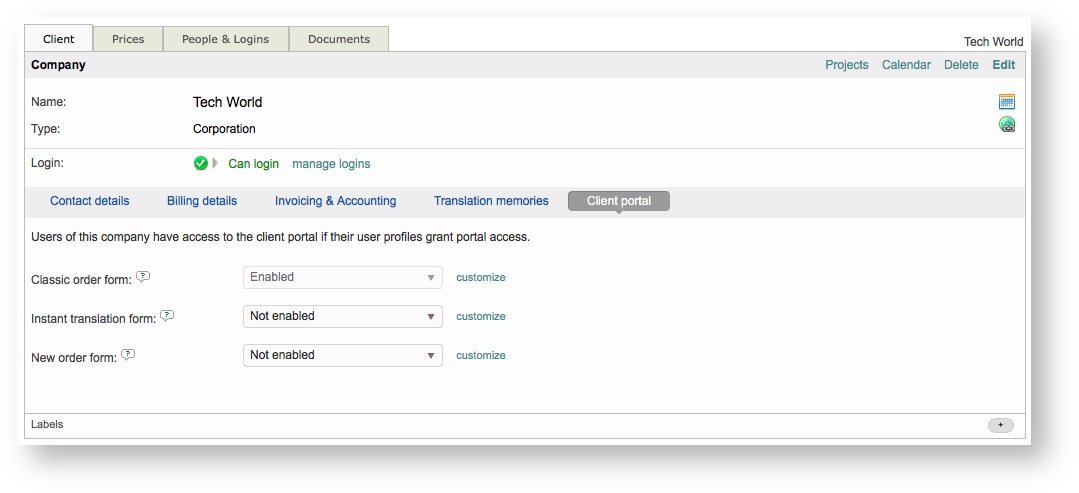
On the Client Tab, you will see Client Portal and it is automatically selected. This is where you may configure forms for the client to use including the New Order Form.
At the bottom of the this screen, click on the drop-down menu to the right of New Order Form.
Then select the appropriate order form for the client from the menu. In this example, the client is Tech World and the Tech World - Standard Order Form will be selected.
If the change is saved successfully, you will see Change saved! to the right of the drop-down menu.
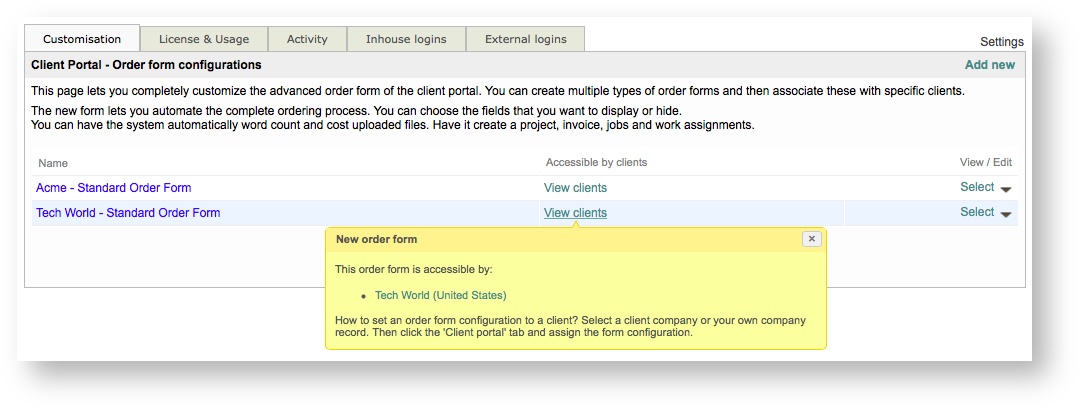
Now if you Access the New Order Form Settings and click on View Clients for the appropriate form, you will see the name of the client in the provided pop up window.
| Note |
|---|
The steps for assigning an order form are the same for inhouse and external clients. You may also follow the same steps when clicking on My Company to configure a form for your company specifically. |
Viewing the Order Form
After the order form has been assigned to a client, any user with an enabled login in the system will be able to log in and use the form to submit requests. Please note that the images are for an external user and more options may be present when accessing the form for your company.
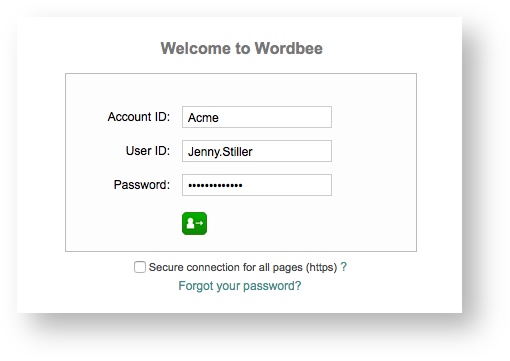
If you have not already done so, log into the system:
Then click on Orders in the toolbar at the top of the screen.
Click on New Order to open the order form.
The order form will appear as shown below. As in this example, you will see Tech World - Standard Order Form as the header on the form. When the user submits a request, every setting you have configured will appear within this form and the process will be automated.
The user options you created when Creating and managing New Order Forms will appear in the Type of Work option.
| Note |
|---|
If you have assigned an order form for your company, internal users will see that form when logging into the system and following the steps above. |


