This page is useful to connect a Beebox project with a cloud sharing system such as Dropbox, an FTP or other mechanisms. By default any file copied to Have a client or computer system drop files and get back translations later on like magic. You probably already know that each Beebox project has two hot-folders: One to receive source files and another one to deliver translations. Requesting a translation is as simple as dropping a file into the project input directory ("in") will be translated into all project languages. . This page shows the input and output hotfolder location, including immediate sub directories.
| Table of Contents |
|---|
Hot folders and languages
If a file is placed into the input hot folder, Beebox will trigger translation workflows into all target languages configured in the project.
What if you want to give the choice of the target language? This can be done using this page:
...
For example, create folders such as "Translate into French", "
...
Translate into Chinese"...
...
| Table of Contents |
|---|
Assigning languages to folders
Click the Directories In other words, each folder triggers translation into one (or selected) target languages. A client or computer system can then easily specify the wanted language by copying the files into the corresponding folders.
Configuring hot folders
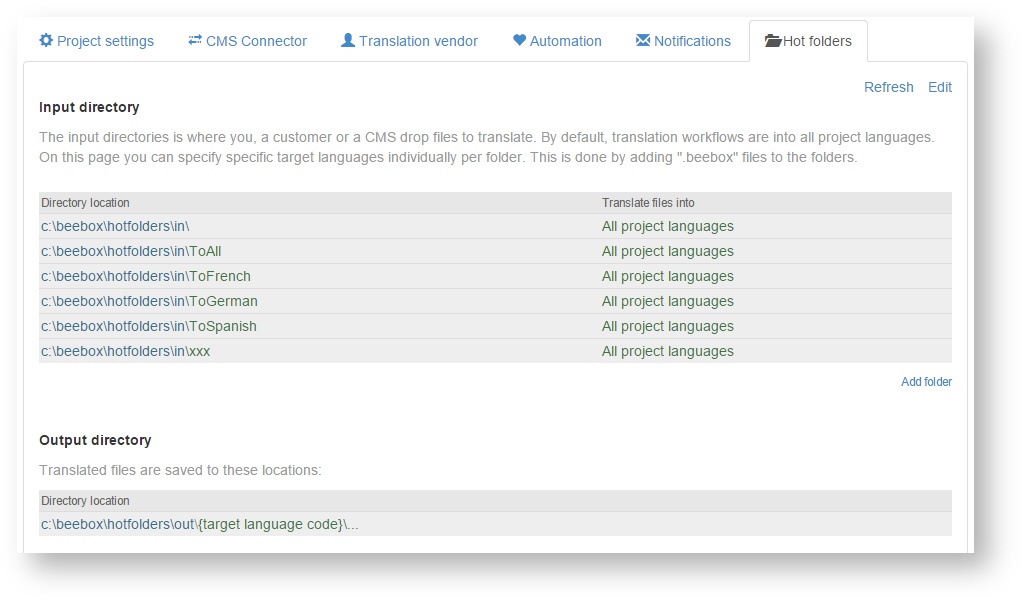
Click the Hot folders tab in a project's Settings page:
All folders inside the project input directory are listed together with the languages into which source files are translated.
Click Edit to customize languages per folder. In the example below we changed the target languages. If you now copy a file into " ...\in\ToFrench", Beebox will pick up the file for French translation only.
Folder configuration settings - Advanced
...
Advanced delivery of translated files
With the second option below, you can simplify delivery of translated files to a client using a cloud sharing system or FTP:
With this option, translated files are copied back to the input directory inside a subfolder (you customize above). Consequently, it is sufficient to share the input directory with a client. The client can then paste source files into the shared folders and receive back translations inside the very same folders.
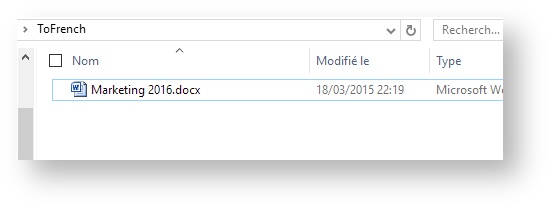
In the example below, we can see the source file of the client in a shared hot folder "To French":
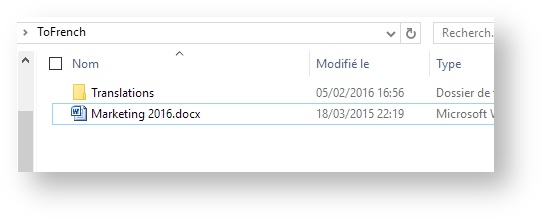
Once the translation is done, the "Translations" sub folder is created:
Inside the sub folder the client finds the translated document. Note how the file name includes the language code according to our settings above:
Folder configuration files
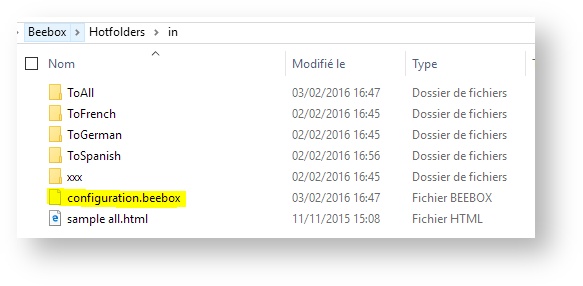
If you push files using software or scripts into hot folders, you may be interested to know that folder properties are contained in a small JSON file inside each folder. These files are named "configuration.beebox". For the above examplescreenshot, Windows file explorer shows us the this content:
Note: If you do not see the file then your file explorer is not showing hidden files. Indeed, Beebox flags the configuration files as hidden.
Inside the ToFrench folder, we too have a .beebox file:
The configuration These files are all optional . If and a folder contains no configuration then it without a file "inherits" the configuration of the closest its language properties from its parent folder.
The content of the file itself is very simple JSON file:
| Code Block |
|---|
{"translate":true,"locales":["fr"]} |
Field translate enables or disables translation. Field locales is a list of target languages. A null value means that translation is for all project languages.
File configuration settings - Advanced
It is also possible to set target languages individually per source file. Or, include comments, deadline and any meta-information.
This requires to create a similar JSON file as the one described above.
Learn more, and so on.
If you want to learn how to create these files yourself (or by software), please see this chapter:


