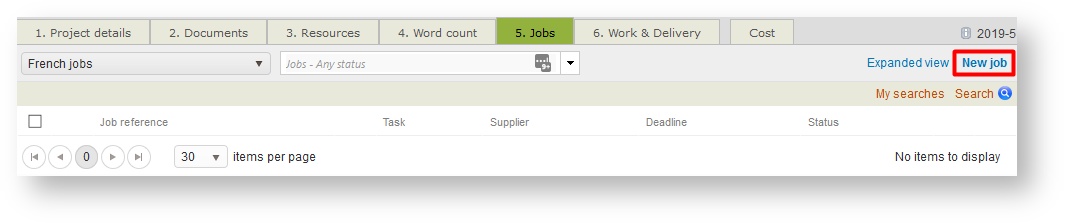
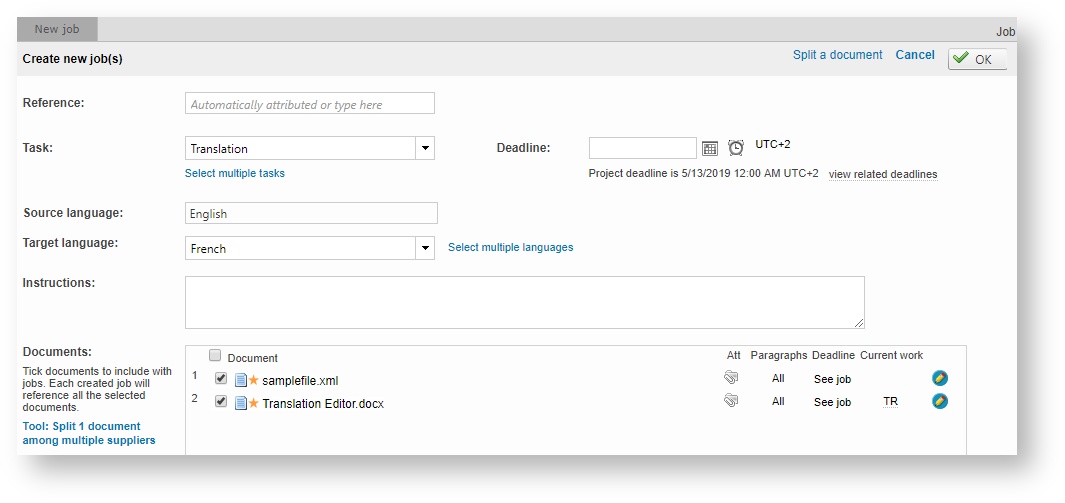
The form for creating a new job will appear as shown below: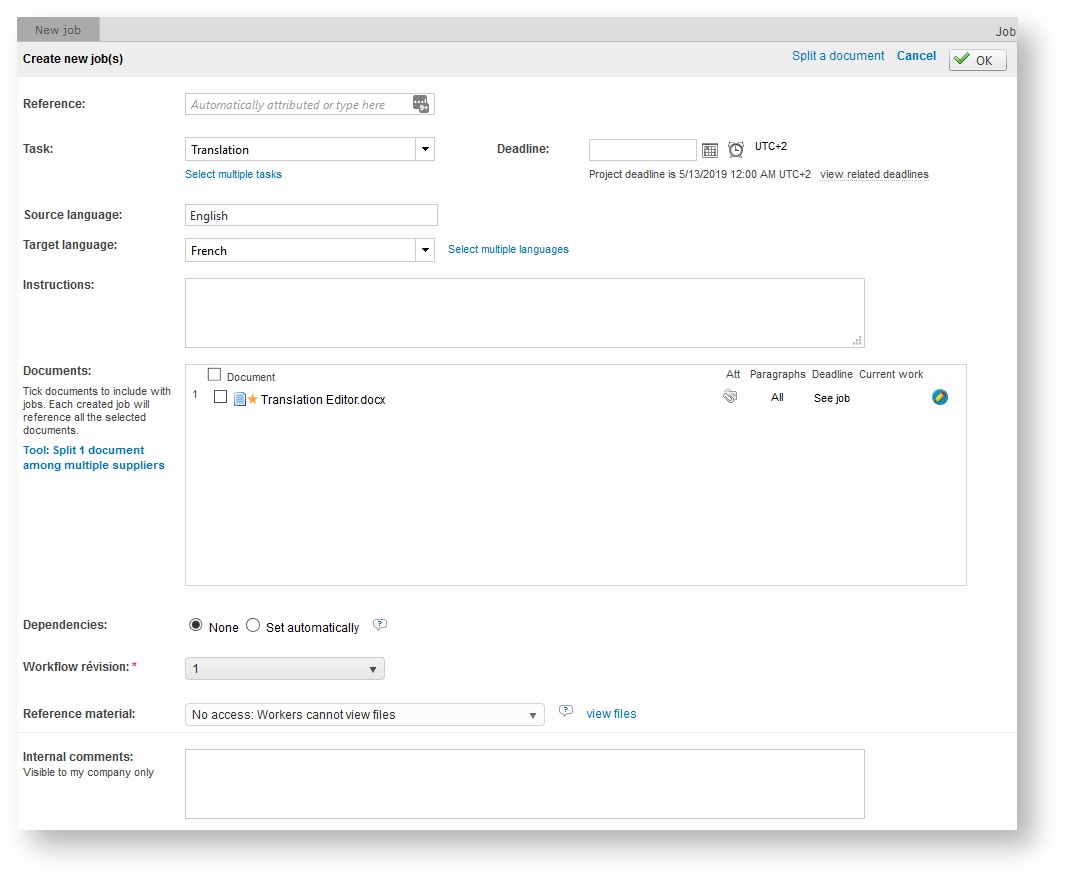
At this level, it all depends on how many documents your project is made of and how you plan to assign jobs to your suppliers.
| Info | ||
|---|---|---|
| ||
This section will be is relevant if you count on creating invoices in Wordbee. You will first need to assign the job(s) in the project to yourself, then you can directly go to the costs section at the bottom of the page |
There are 4 possible scenarios:
- Scenario 1: Your project is made of 1 document and you want all the jobs to be performed by one supplier.
- Scenario 2: Your project is made of 1 document and you want the jobs to be performed by multiple suppliers.
- Scenario 3: Your project is made of multiple documents and you want one supplier to perform the jobs.
- Scenario 4: Your project is made of multiple documents and you want various suppliers to perform the jobs.
Anchor Scenario1 Scenario1
Scenario 1 (One Document and One Supplier)
| Scenario1 | |
| Scenario1 |
The project includes one document and you want only one supplier to translate it.
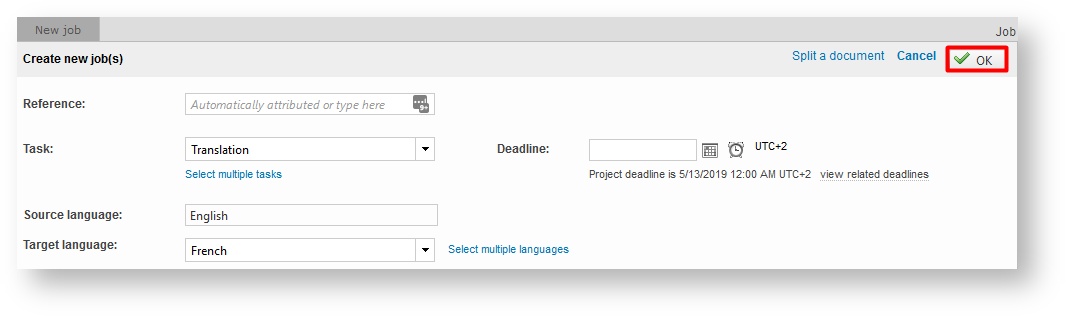
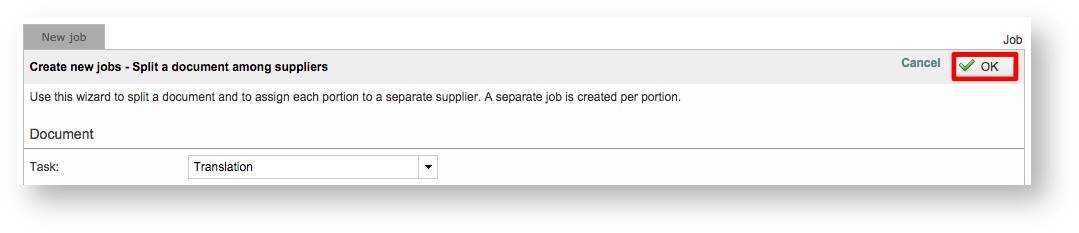
First, make certain the appropriate task has been chosen and then select the document by ticking the corresponding checkbox. Click on OK at the top right of the page to finish creating the job.
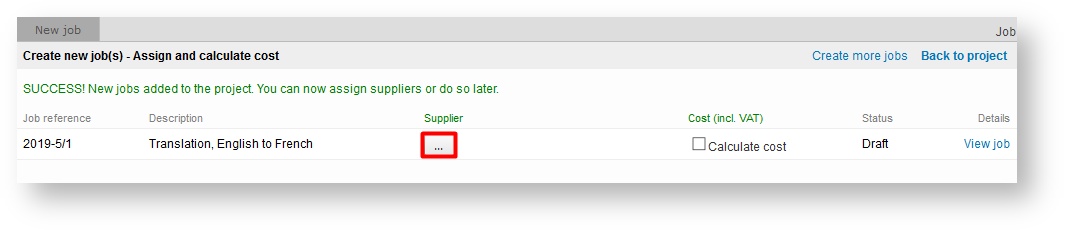
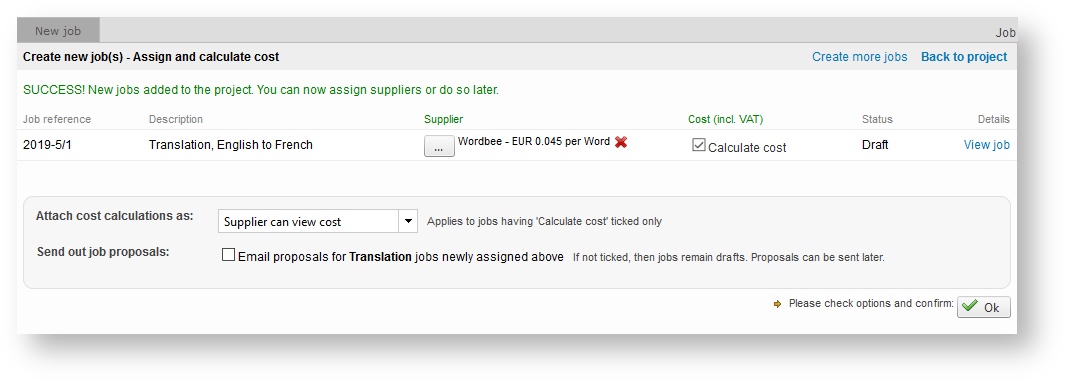
After the job has been created, you will be directed to the page below. Next, you will need to select the supplier by clicking on  .
.
| Anchor | ||||
|---|---|---|---|---|
|
2. Job Assignment
| Info | ||
|---|---|---|
| ||
This section will be is relevant if you count on creating invoices in Wordbee. You will first need to assign the job(s) in the project to yourself, then you can directly go to the costs section at the bottom of the page |
If you have a freelance entrepreneur account, you need to create jobs into your project and assign them to yourself only if you want to generate invoices for your work. If you are not interested in invoices for your business, you can translate directly in the editor without creating jobs.
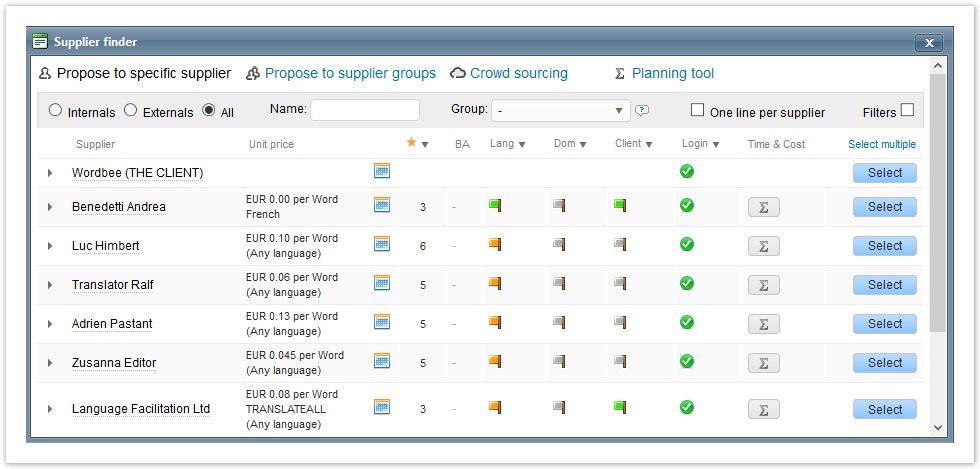
Step 1. Click on Select to the right of the appropriate supplier in the list.

Note:
The calendar box only shows To check the availability of the suppliers, click on the calendar icon. The calendar does not show appointments, only:
*
The days flagged as worked or not worked including weekends.
*
The open jobs
It does not show appointments. Choose
.
Step 2. Tick Calculate cost if you want to calculate the cost
,and send a quote/ invoice to the supplier
, and if this person will be able to. Indicate whether the supplier can view or not
thisthe cost. When all the parameters are set,
click on Okclick OK:
| Anchor | ||||
|---|---|---|---|---|
|
The project includes 1 document and you want multiple suppliers to translate it.
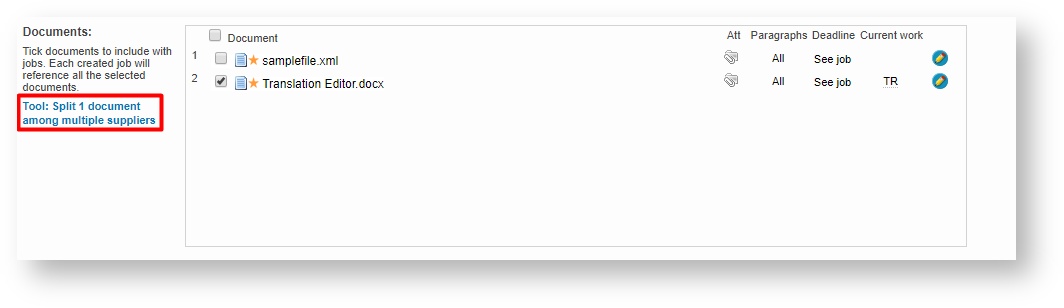
Select the document by ticking the corresponding box and then click on Tool: Split 1 document among multiple suppliers.
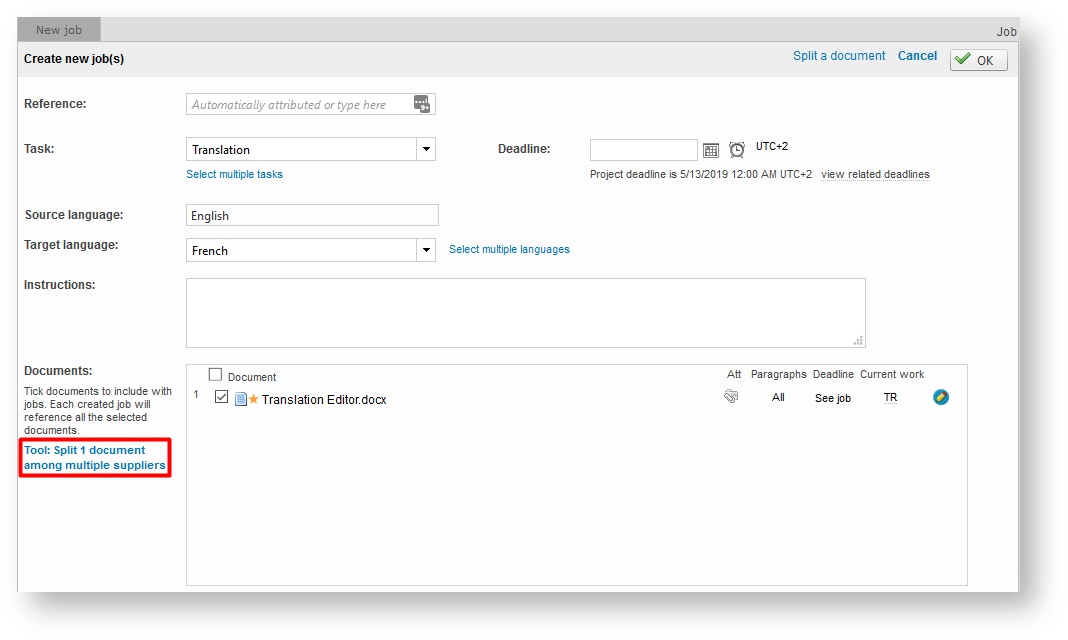
The Use the attachment icon enables to attach some files to the document, it can be upload any files relevant for the translation of the documents, for example, screenshots, instructions, reference material or whatever material that might be needed. This icon may be used by the project manager, the supplier, or simply serve to store documents that are needed by an entire the team working on the same project needs (e.g.: , intermediary or final deliverables...).

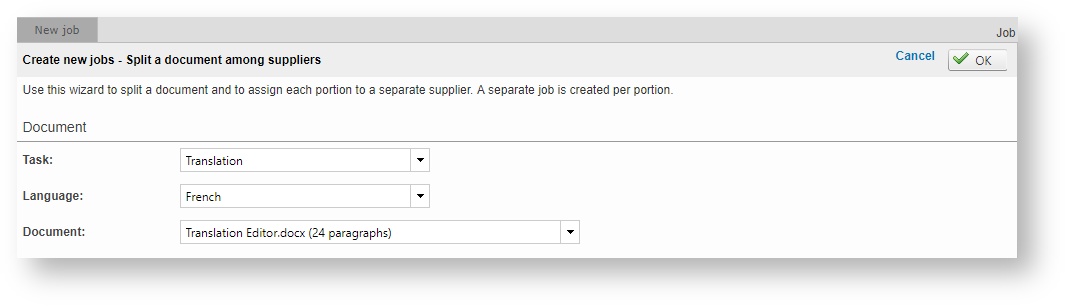
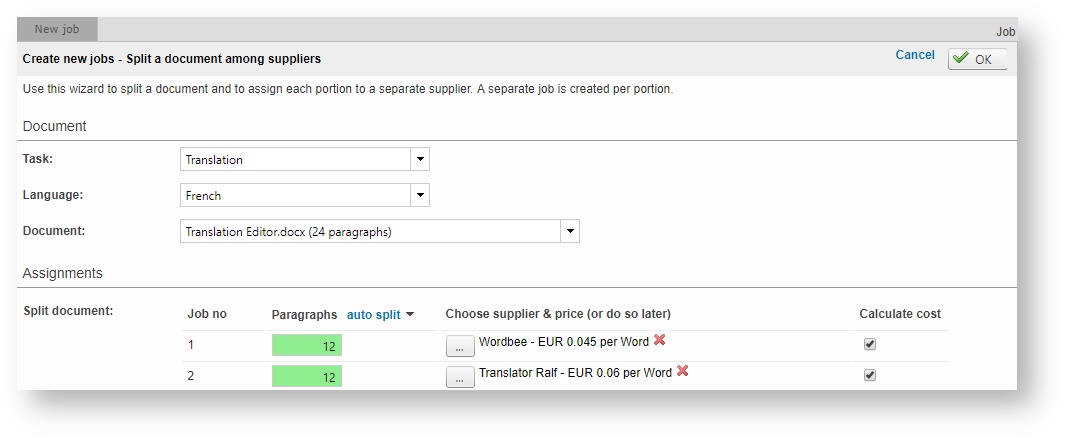
On this page you will be able to Once you click on Tools: Split 1 document among multiple suppliers, a wizard will open where you can assign each portion of the document to a separate supplier. Here you can also configure several items for the new job including document related items (task, source language, target language) and assignment related items (paragraphs, supplier, costs, etc).
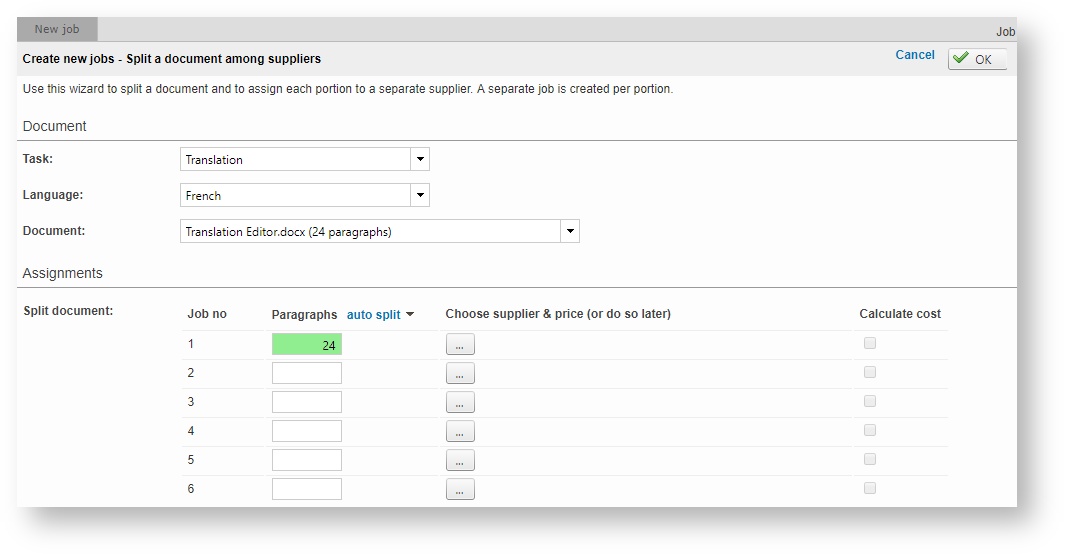
Step 1: Configure the Document parameters . These are the tasks and languages for the job and here you may change current configuration settings or configure them when not already done.by selecting the task, language and the document portion you want to assign to the supplier.
Step 2: Assign the Work work to Each Suppliereach supplier
In Assignments, you split the selected document into one to six different jobs by either by:
- Setting the number of paragraphs manually by clicking on the field and entering the number of paragraphs each supplier will translate.
OR
- Clicking on Auto Split and choosing the number of splits from the drop-down menu.
Then assign a supplier to each Job No by clicking on  for each line. Click on Select in the pop-up window to choose a supplier.
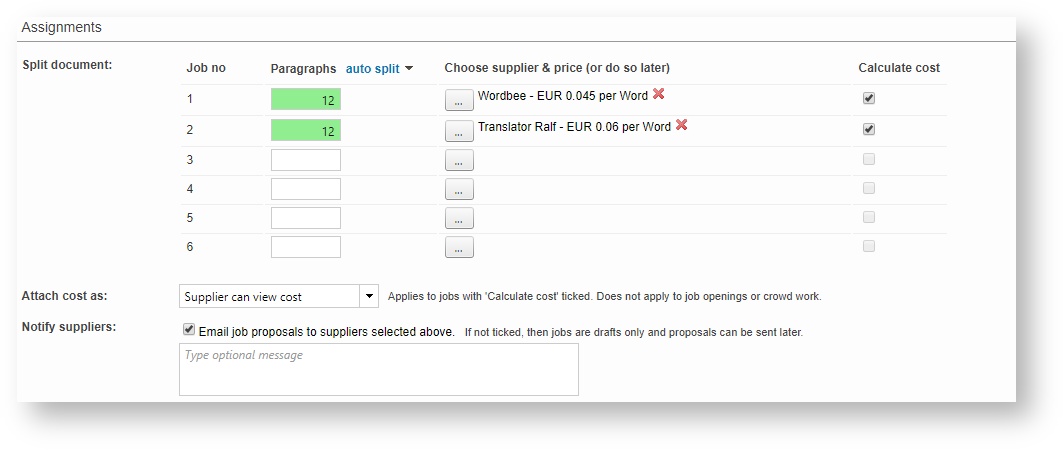
You can see that the The Calculate cost checkbox has been automatically ticked. When this option is enabled, you will be able to attach the quote/ invoice to the suppliers and let them view, or not, the cost. You can uncheck the box if you don't want to send something yet.
Tick the Email job proposals to suppliers checkbox, if you want the suppliers to be immediately notified of the jobs. An email will be sent to the suppliers with your instructions and a link to connect him/ her to the Wordbee Translator interface.
Step 3: Instructions
The Instructions section may be used to configure a deadline, enter a reference number, provide instructions, and configure file viewing access for the job.
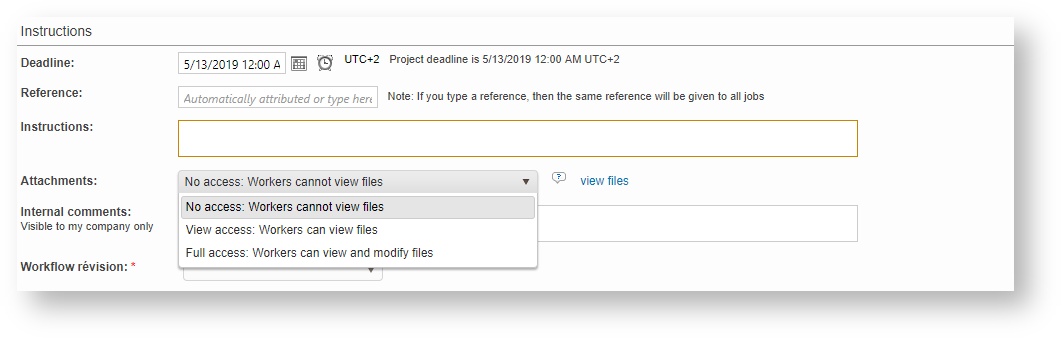
Click on Ok OK when you are satisfied with the different parameters.
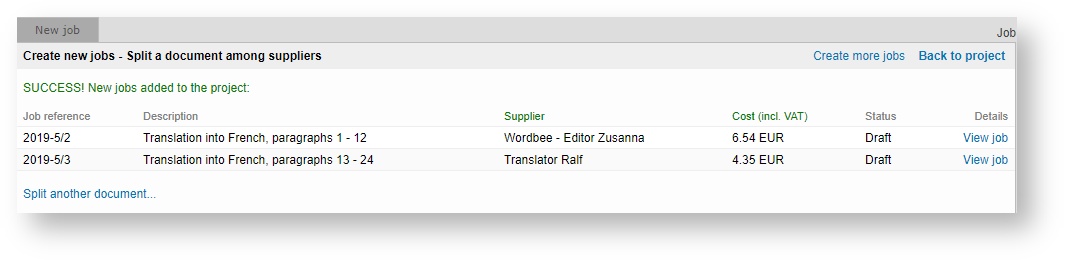
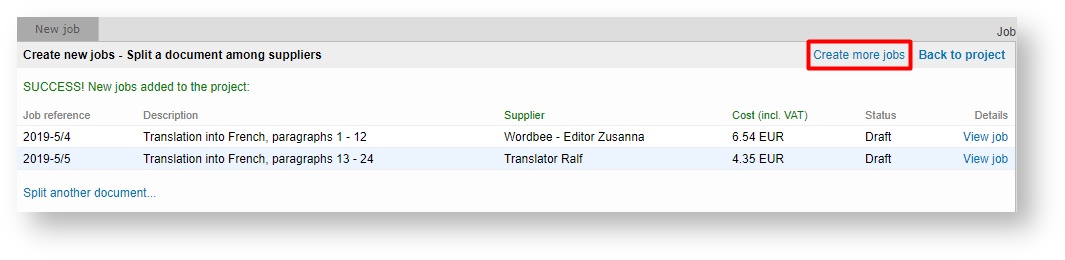
The split job will appear similar to what is shown below:
Anchor Scenario3 Scenario3
Scenario 3 (Multiple Documents and One Supplier)
| Scenario3 | |
| Scenario3 |
If you want one supplier to translate all the documents for a job, then tick the checkbox next to each document and click on OK.
Then follow the steps outline in Scenario 1 for selecting a supplier.
Anchor Scenario4 Scenario4
Scenario 4 (Multiple Documents and Multiple Suppliers)
| Scenario4 | |
| Scenario4 |
Select one document and follow the steps of Scenario 2. Create a new job, tick the checkbox for the appropriate document, and then click on Tool: Split 1 document among multiple suppliers.
Next, configure the document options and then split the paragraphs manually or by using Auto Split. Finally, assign a supplier to each job number.
Repeat the same operation for each of the uploaded documents. You will have to click on Create More Jobs to configure this for each additional document.
Once you have created a job you can click on the Cost tab to see how much a job is going to cost you:Anchor #Scosts #Scosts

Here you can change file access for individual jobs, see additional details, and make changes if needed. 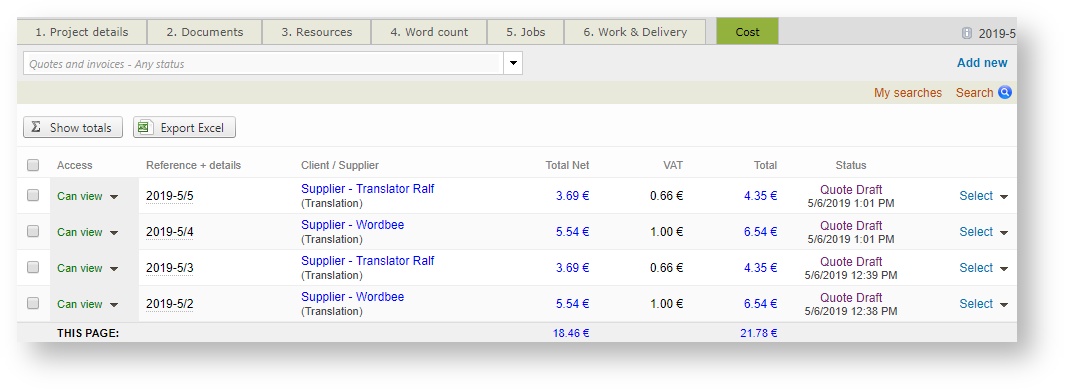
| Anchor | ||||
|---|---|---|---|---|
|
3. Related pages
| Panel | ||
|---|---|---|
| ||