The classic order form can be integrated with your website and provides an easy way for new clients to request work by submitting a general order. When this form is used, the order will be viewable in the system; however, the client will not exist and a project must be created manually from the submitted order.
...
A pop-up window will appear as shown below. Here you can either create a new project or attach the order to an existing project. For new clients who submit their order through the classic order form, you will want to create a new Standard or Codyt project. Make certain Standard has been selectednew project. Make certain that create Standard project has been chosen in the pop-up window.
You have the option to enter a project reference. If nothing is entered, then the system will automatically assign one for the project. Since this is a new client in the system, a project template will most likely not be available. Project Project templates can be used to streamline several tasks for new projects in the system including compatible resources, workflow, pricing, word count settings, document format profileprofiles, and custom fields. These are typically created after one project has been placed in the system for a client. To learn more, please see Project Templates in the User Guide section.
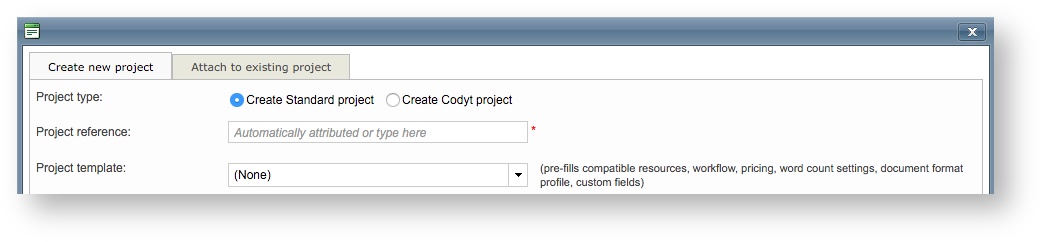
Additionally, you can configure what tasks will be completed for the project (i.e. translation, revision, proofreading, etc.). Tick each applicable checkbox in the pop-up window to configure this information for the new project. For this example, there are no project templates and only translation + revision will be performed.

A pricelist defines the costing for work to be done. With it you will define the currency, discounts for fuzzy matches, discounts for pre-translations, and the price per task (translation, revision, etc.) and language pair (English to German, German to French,...)/language pair. For orders being submitted through the classic form, you typically will not have a pricelist defined for the prospective client.
...
When an order is submitted through the classic order form, you may not always know the pricing for the tasks to be completed. In these instances, it is best to choose the a default standard pricelist or another standard pricelist you have created in the systemfor the required tasks or document types. Click on the appropriate selection to continue. To learn more about creating pricelists, please see the Client Price ListsPricelists page.
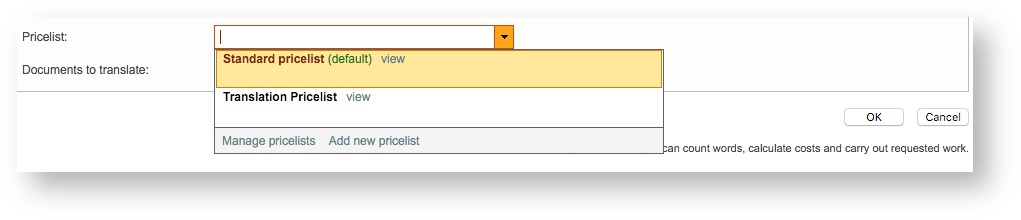
After a pricelist has been chosen, you will see an additional option titled "Documents to translate". By default this option is checked (recommended). This informs the system to copy every file attached by the client through the classic order form to the standard project being created. Click OK once you have finished the configuration.
...
Now that the project has been created in the system, you will be able to make pricing changes, mark the document for translation, perform a word count, calculate the cost, create quotes, propose jobs to suppliers, and generate invoices for completed work.To do so, click translation, perform a word count, and so on. Click on the Project Tab to access the project details for the order.
...
The document(s) must be marked for translation in order to be pre-translated. Click on the Documents Tab, make certain the right language folder has been chosen, and then right click on the appropriate source document.Next Next, perform these tasks:
- Click on Translate Yes/No.
- Click on Mark for online translation.
- Click on a radial to choose how the document will be translated (No, Yes, Offline, or Yes, Online).
- Click on Confirm in the bottom of the pop-up window.
- Make any needed configuration changes.
- Click on Confirm again.
...
| Info |
|---|
For more information about marking documents for translation, please see the Upload Documentdocument(s) page for Standard projects in the Getting Started Guide. |
Step 3: Count Words
...
Next, you will need to complete a word count for documents so that the costing is correct and a quote can be generated for the project. This information is necessary to properly calculate the cost based on the number of words and the pricelist information.
For a standard project, this is done by clicking on the Word Count Tab and then clicking on Count Words. If there is more than one target language, you will need to choose each target languages language in the drop-down menu and then perform this step for each one.

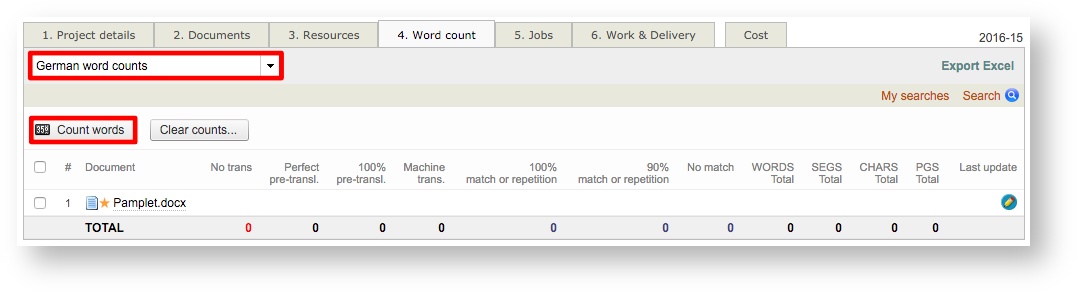
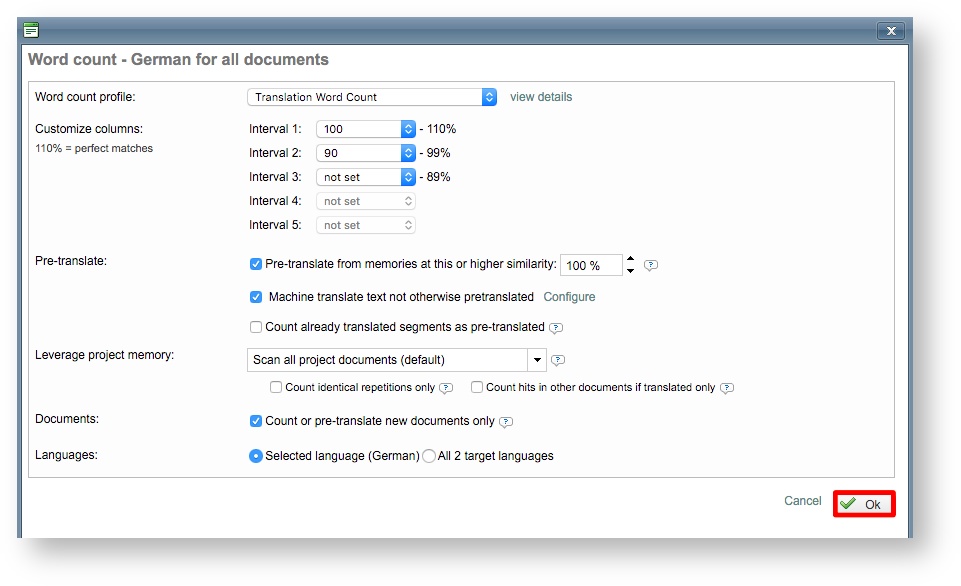
Choose a Word Count Profile or manually configure the options within the pop-up window. Then click on OK to finish the configuration.

| Info |
|---|
To learn more about Word Count Profiles, please see the Create a Word Count Profile page. |
| Info |
|---|
To learn more about performing a Word Count for Standard projects, please see the Count Words page in the Getting Started Section. |
Step 4: Create a Quote
Next, you will need to generate and attach a quote to to the project. First, click quote. Click on the Cost Tab and then click on Add New.

Then complete Complete the following steps:
- In the pop-up window, leave the current options selected and click on Continue.
- Choose a pricelist from the drop-down menu and click on Continue.
- In the preview window, make any needed changes.
- Click on OK to save the quote draft.
- Click on Close to exit the preview window and return to the Cost Tab.

Next, you will need to attach the quote to the project. To do this, click on Select to choose the quote draft on the Costs Cost Tab. Then complete the following steps:
...
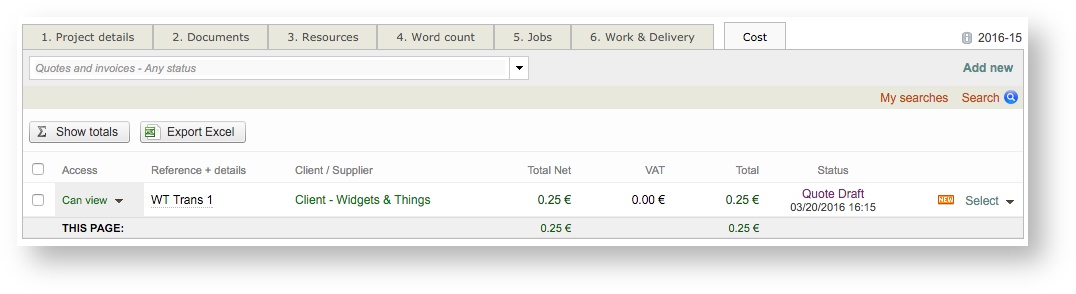
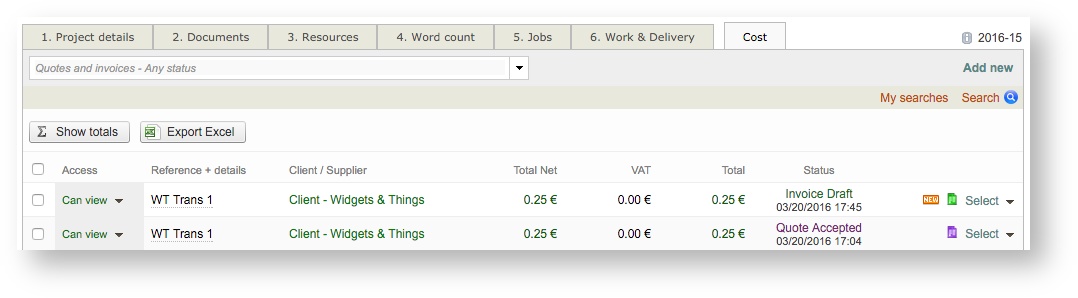
Once the quote draft has been created and attached to the project, the Quotes and Invoices section will appear as shown below. The quote can be printed, downloaded, exported, etc.

| Info |
|---|
For more information about completing quote generation for Standard projects, please see the Client Quotes & Invoices section. |
Step
...
5: Send the Proposal
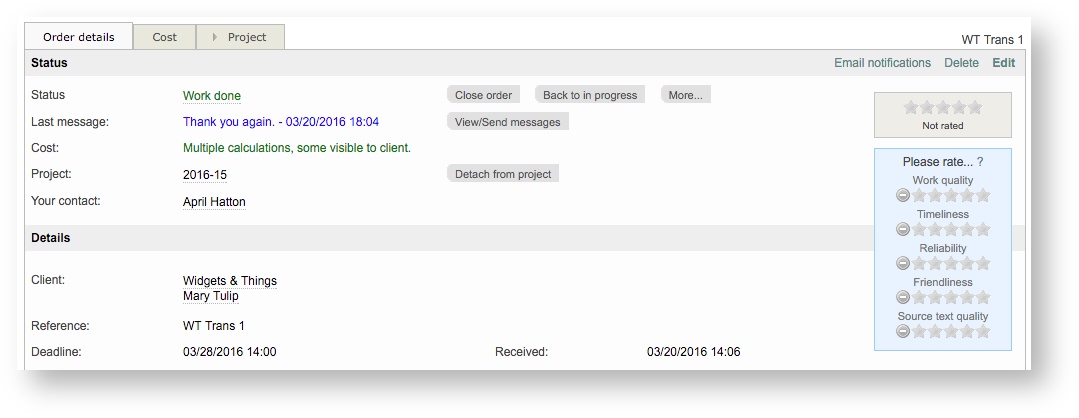
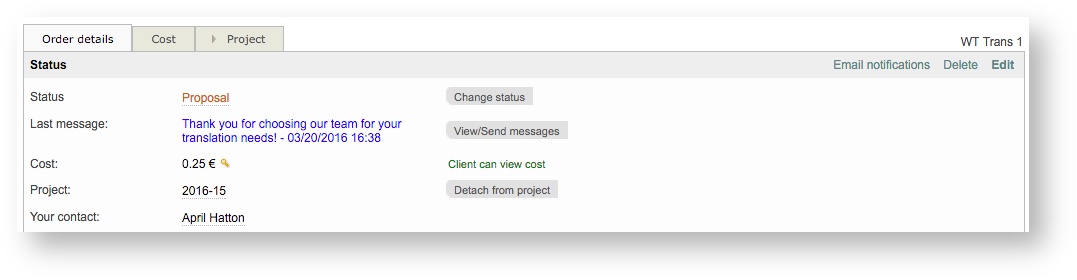
Now when you view the order, you will see the cost on the Order Details Tab. Access permissions will also be displayed for the client. If you have the client portal and a login exists for the client, they can view the cost and quote information by logging in.
...
Your message will appear in the Order Details as shown below and the status will now show Proposal.
Step
...
6: Create & Assign Jobs
You are now ready to create jobs for the project and send job proposals to suppliers. To do this, click on the Project Tab when viewing the order. Then click on the Jobs Tab and New Job.
...
A job will need to be created for every task that is part of the project (Translation, Revision, etc.) and each language pair (French, German, etc.). To complete job creation, perform the following tasks:
- Choose a task from the drop-down menu.
- Configure the source language.
- Configure target languageslanguages. Use the drop-down menu or click on Select Multiple Languages to choose more than one target language.
- Enter a deadline for the job.
- Add any required instructions.
...
| Info |
|---|
To learn more about creating jobs for Standard projects, please see the Create and Assign Jobs page in the Getting Started Guide. |
...
Next, a supplier will need to be chosen for the job and sent a proposal. To do so, click on  to choose a supplier for the job. Jobs may be assigned to an individual supplier, proposed to a supplier group, or even crowd sourced. in the provided pop-up window, you will need to:
...
| Note |
|---|
These steps will need to be performed for each task and language pair that must be completed for the project. For example, a Translation job might jobs may need to be created for English > German and English > French if both target languages are configured for the projecttranslation and revision. |
| Info |
|---|
For more information about creating jobs for standard projects, please see the Create and Assign Jobs page in the Getting Started Guide. |
Step
...
7: Generate Invoices
After all jobs have been completed, the next step will be to generate an invoice for the completed work. To generate an invoice, you will need to:
...
A new pop-up window will appear and here you will need to attach the invoice to the project. Perform the following steps to complete this process:
- Click on Attach next to Invoice.
- Click on Upload to use your own template for the file (or)
- Click on Create File to use the default Wordbee template.
- Click on Save and Attach. After the invoice has been attached, you will see a Download option.
- Click on Close to exit the pop-up window.
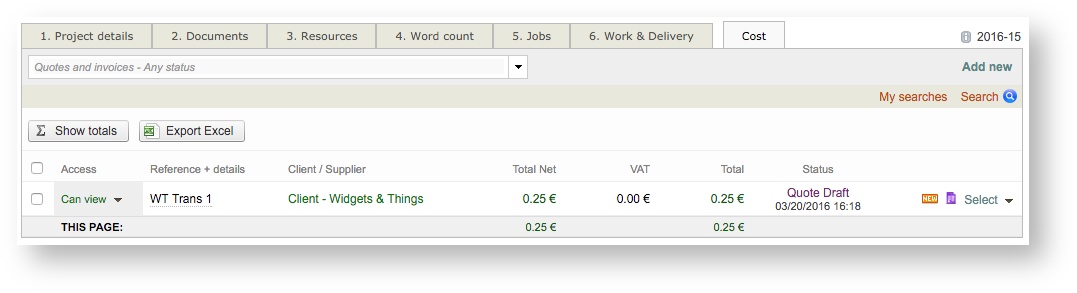
- The Cost Tab will appear as shown below once an invoice has been created and attached to the project.
| Info |
|---|
To learn more about generating invoices for clients or suppliers, please see the Client Quotes & Invoices section underneath Project Management Tasks. |
Step
...
8: Finalise Translations
Before you will be able to finalise the project, you will need to manually mark the jobs as completed since this process is not automated for Standard projects. This can be done on the Jobs Tab by:
...
| Info |
|---|
To learn more about finalising Standard projects, please see the Finalising Translations page in the Getting Started Guide. |
Step
...
9: Copy Project Documents to Order
The finalised project documents must now be copied to the order. To do this, you will need to click on Orders in the Menu Bar and select the order. Then complete the following steps:
...
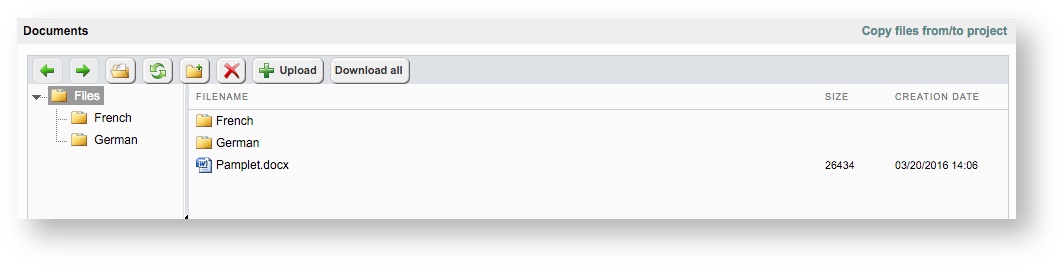
The Documents Section on the Order Details Tab will now show the finalized documents, as shown below:
Step 10: Mark Work as Done for Client Approval
After the documents have been copied, you will be able to mark the order as done:
...
Once the the above steps have been completed, the Order Details Tab will appear as shown below when viewing the order. You have the option to rate quality, timeliness, source text quality and more. To learn more about ratings, please see the User Ratings section in Administration.